In the previous tutorial you have created your Google Play Developer account and in the mean time you have received your application from us. The next step is to get your application published on the Google Play Store.
First, let's open your Google Play Developer Console. You can access it by clicking this link: https://play.google.com/apps/publish/signin/ and then clicking the "Go to Play Console" button.
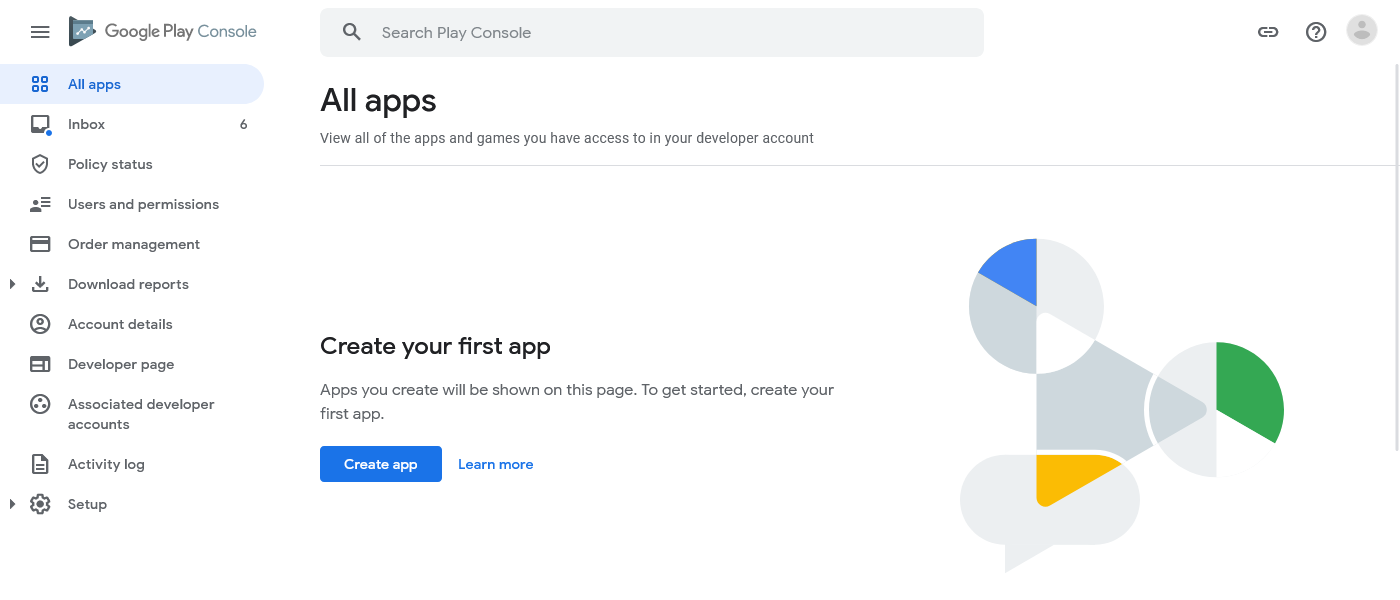
Once you're in the Console, you'll see a screen similar to the one below. Press the "Create app" button to create your app entry.
On the following screen, you first need to enter some basic details about your app: app name, default language, app or game, and whether it is free or paid app. Then, you need to review and accept all declarations and policies.
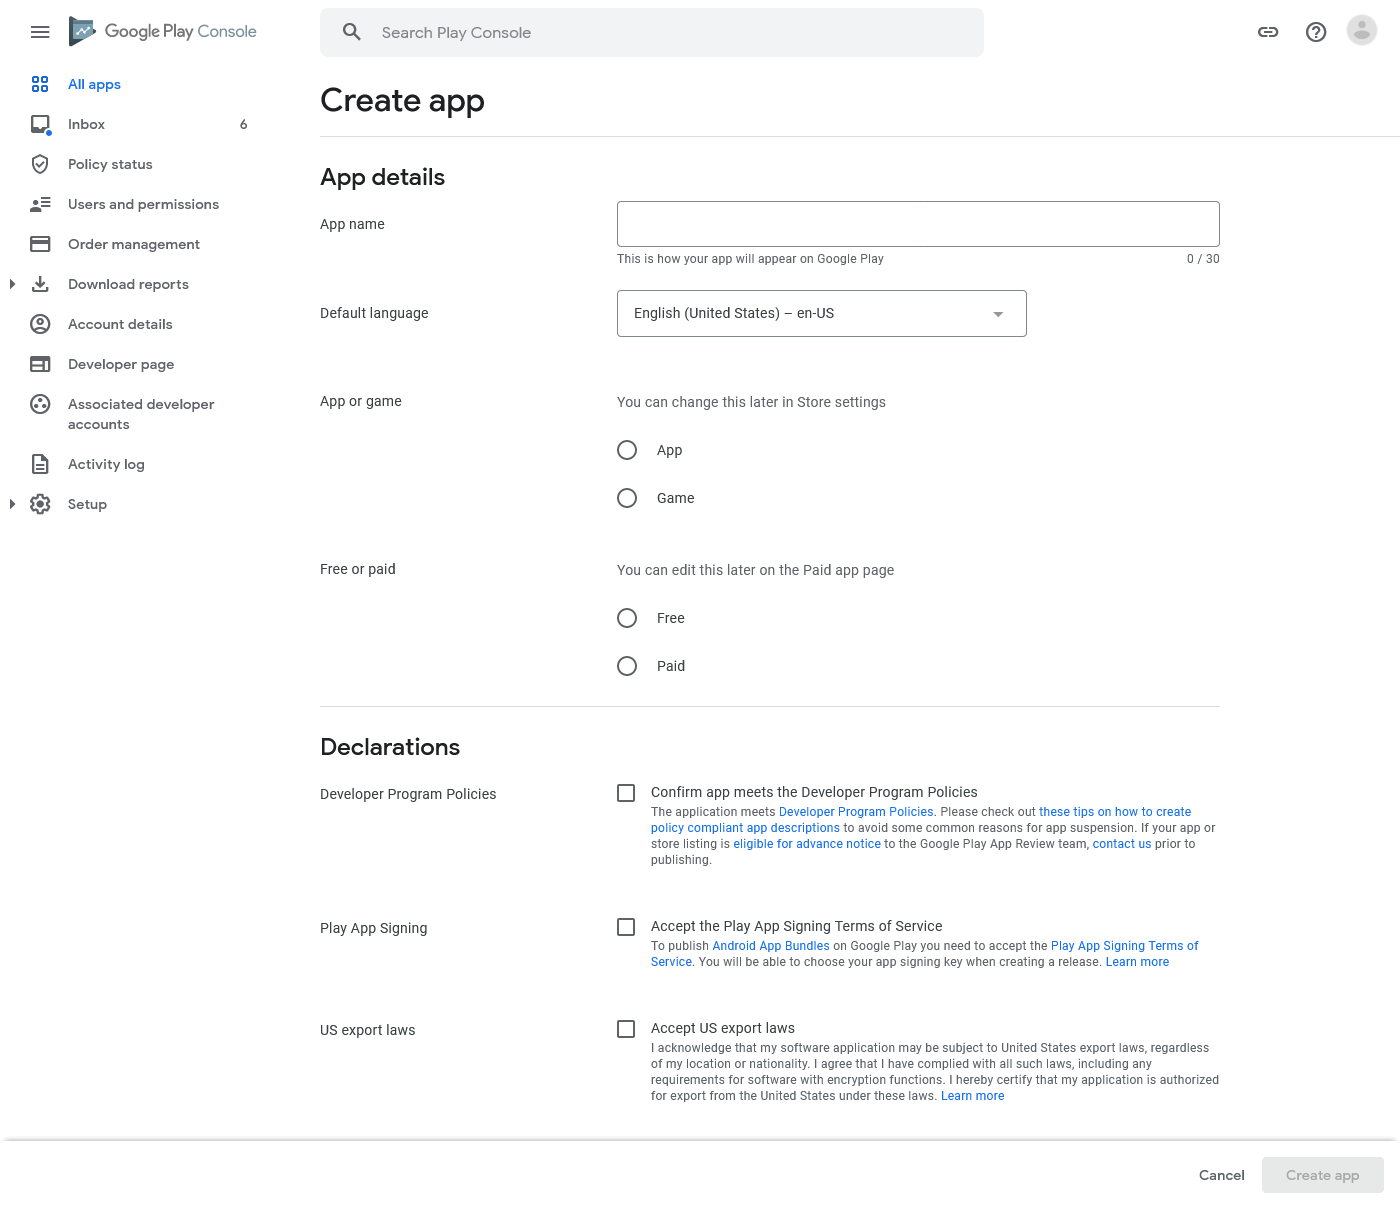
After you enter the required details, press "Create app" and your app entry will be created. Now you are brought to your app's dashboard.
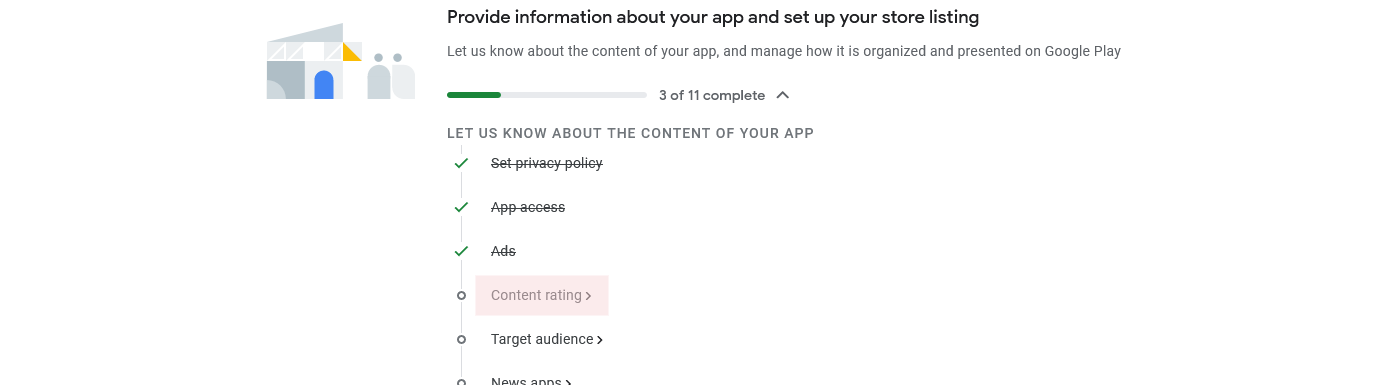
In the dashboard you'll find several sections with tasks. Below we will go through two of these sections, namely the "Set up your app" and "Create and publish a release".
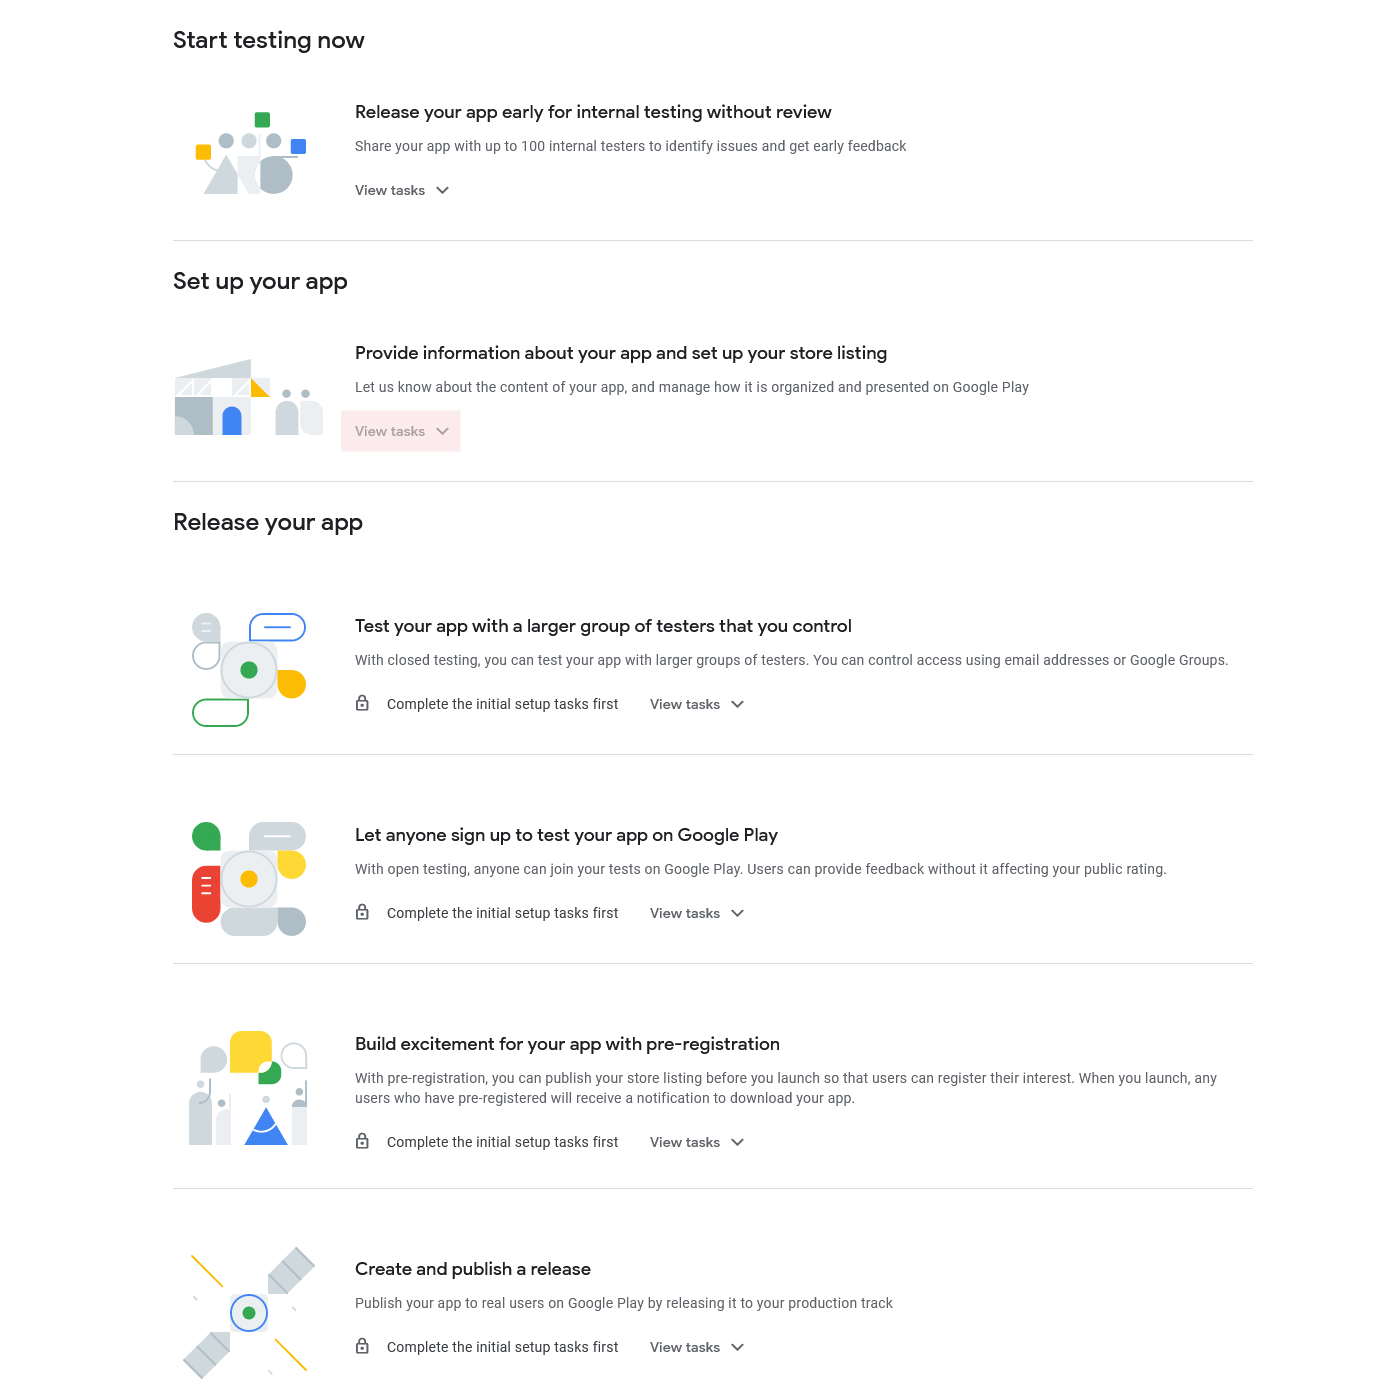
Let's start with the "Set up your app" section.
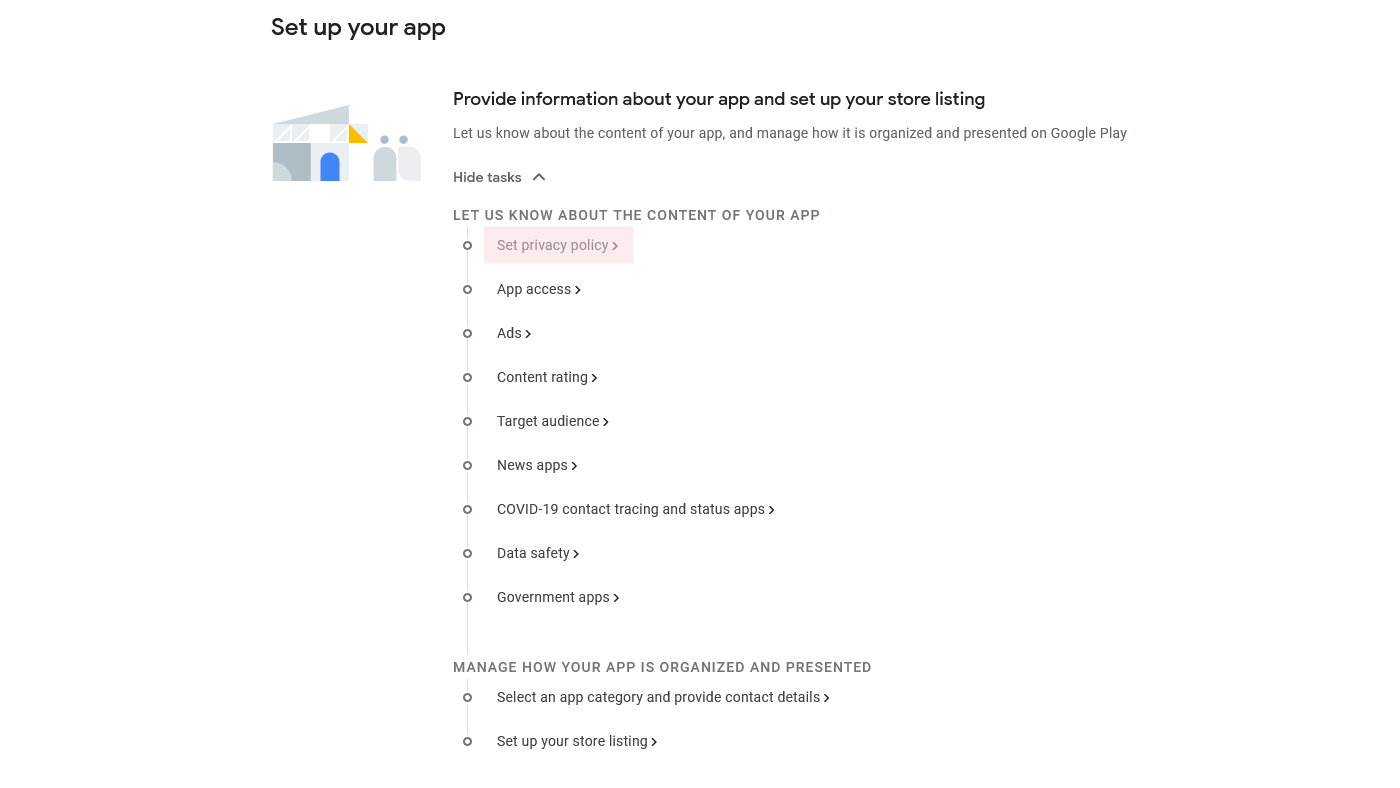
Press the "View tasks" button under the "Set up your app" section and then press the "Set privacy policy" button to start the first task.
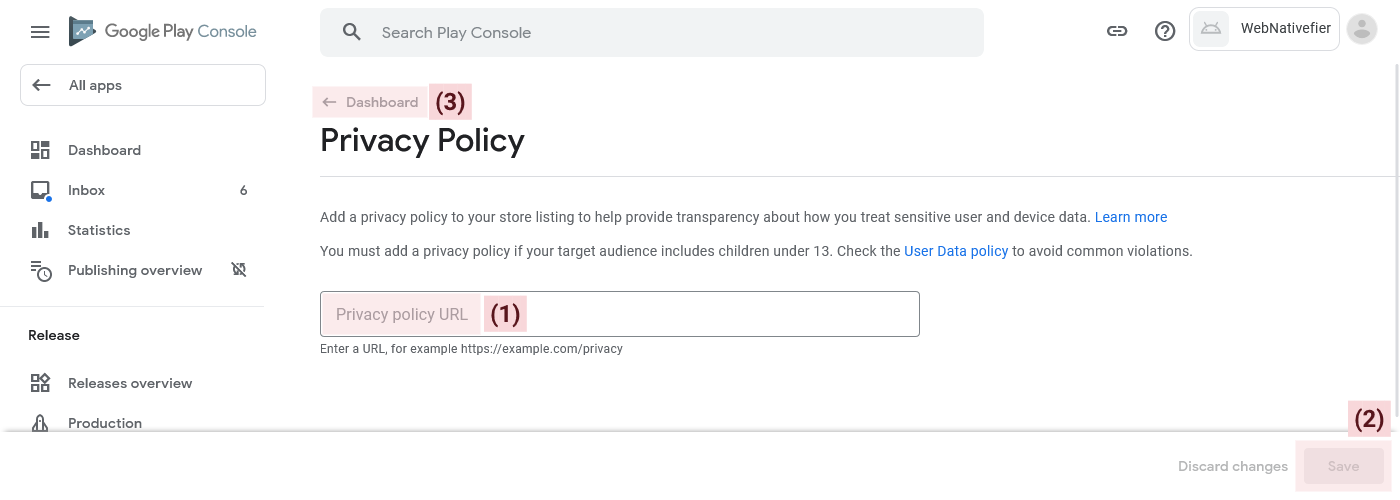
In this task you will be asked to provide a link to your "Privacy Policy".
- Enter the URL to your website's privacy policy
- Press the "Save" button to save the changes
- Press the "Dashboard" button to go back to the dashboard.
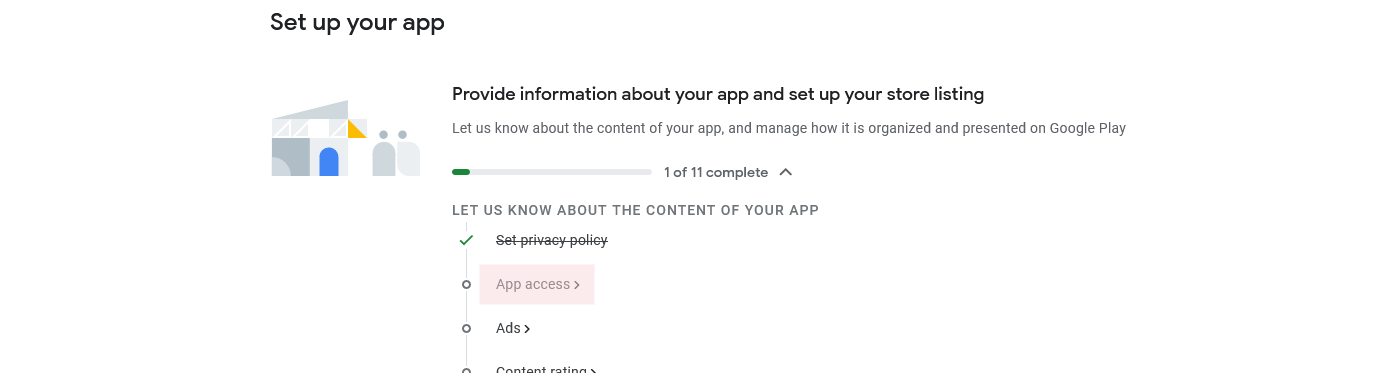
After you set your privacy policy and go back to the dashboard, you can start the next task.
To do this, simply press the "App access" button from the tasks list of the "Set up your app" section.
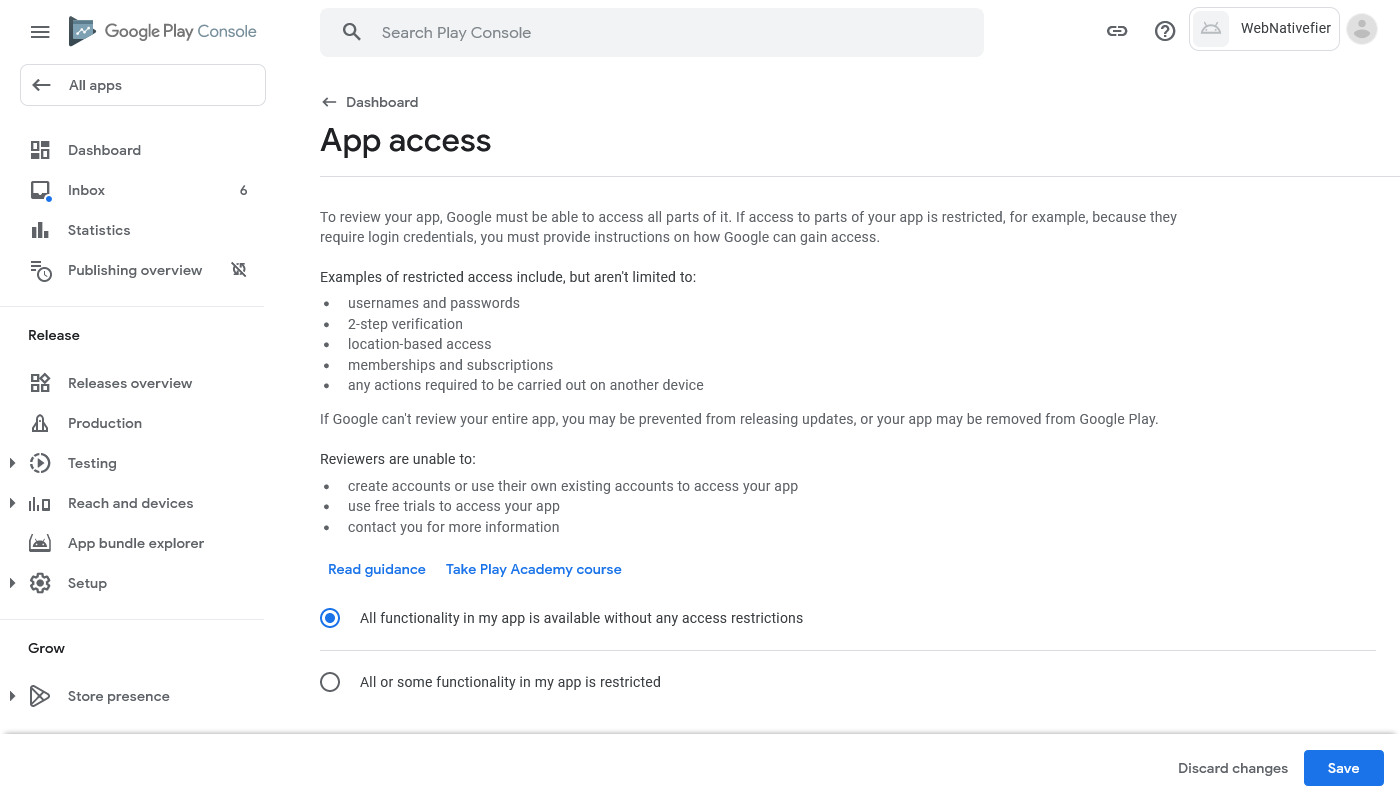
In this task you need to indicate whether all functionality in your app is available without access restrictions, or if there is some functionality that is restricted.
In most cases you can choose the first option: "all functionality is available without any access restrictions".
However, if user accounts are required to access your website, you might need to select the second option and provide login details for a test account, so that Google can review your app completely and make sure it complies with their content policies.
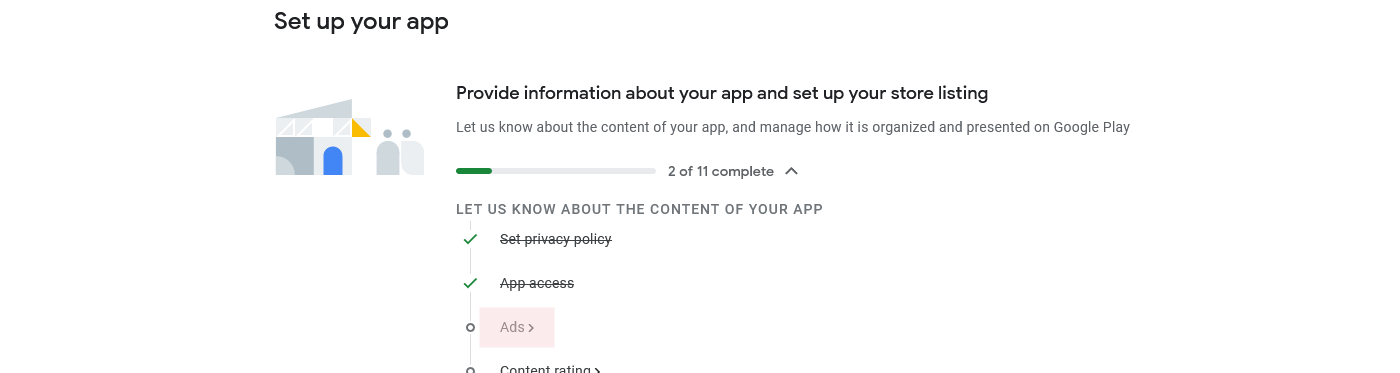
After you save your choice you can go back to the dashboard and start the next task ("Ads").
Here you need to indicate whether your app contains advertisements or not.
Because your website is the primary content of your app, if your website contains ads, you should choose the first option: "Yes, my app contains ads".
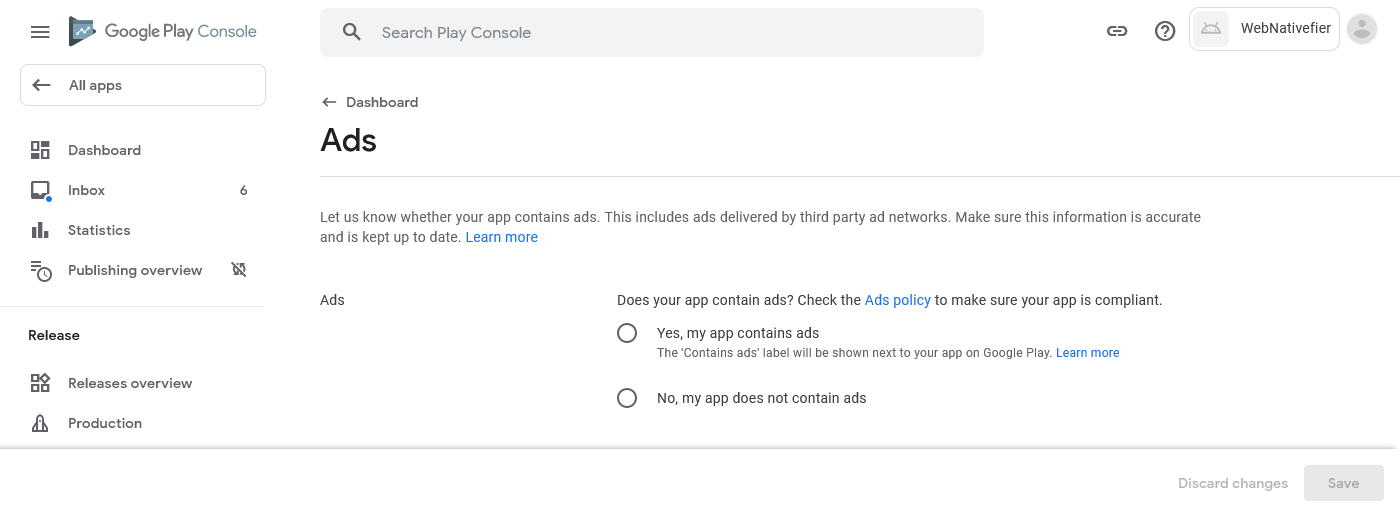
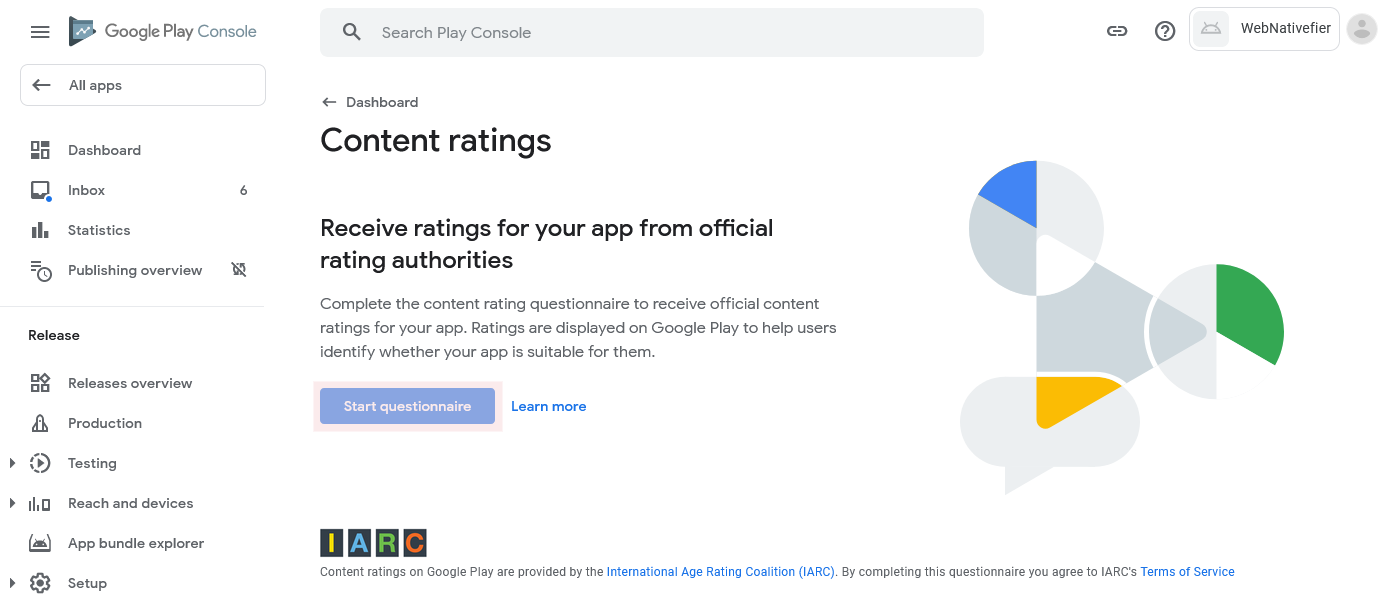
After you save your choice, go back to the dashboard and start the next task ("Content rating").
In this task you are required to answer some questions about the content that is available in your app.
To begin, press the "Start questionnaire" button.
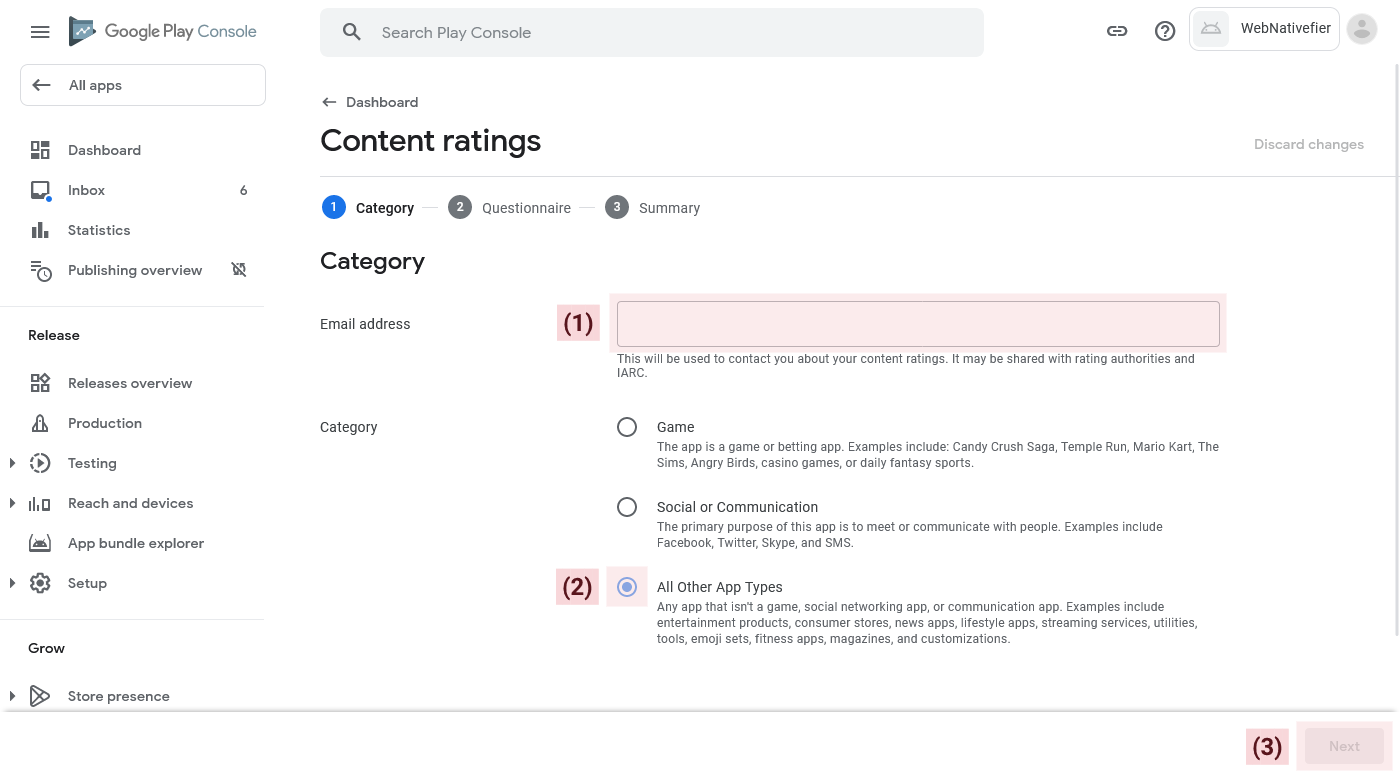
On the next screen you need to enter your contact "email address" and your app "category".
Most of the apps created with WebNativefier are classified under the "All Other App Types" category.
When you answer both questions, press the "Next" button to continue to the "questionnaire".
After you press "Next", the actual questionnaire will open where you are required to answer several questions about the content that is available in your app.
As the content varies for each application, we will leave the majority of the questions for you to answer on your own. There is a "Learn more" button next to each question that will give you more details and some examples.
Nonetheless, there are two questions that should have identical answers for all applications created with WebNativefier:
- Online Content: Does the app feature content that isn't part of the initial app download, but can be accessed from the app? YES
- Miscellaneous: Is the app a web browser or search engine? YES
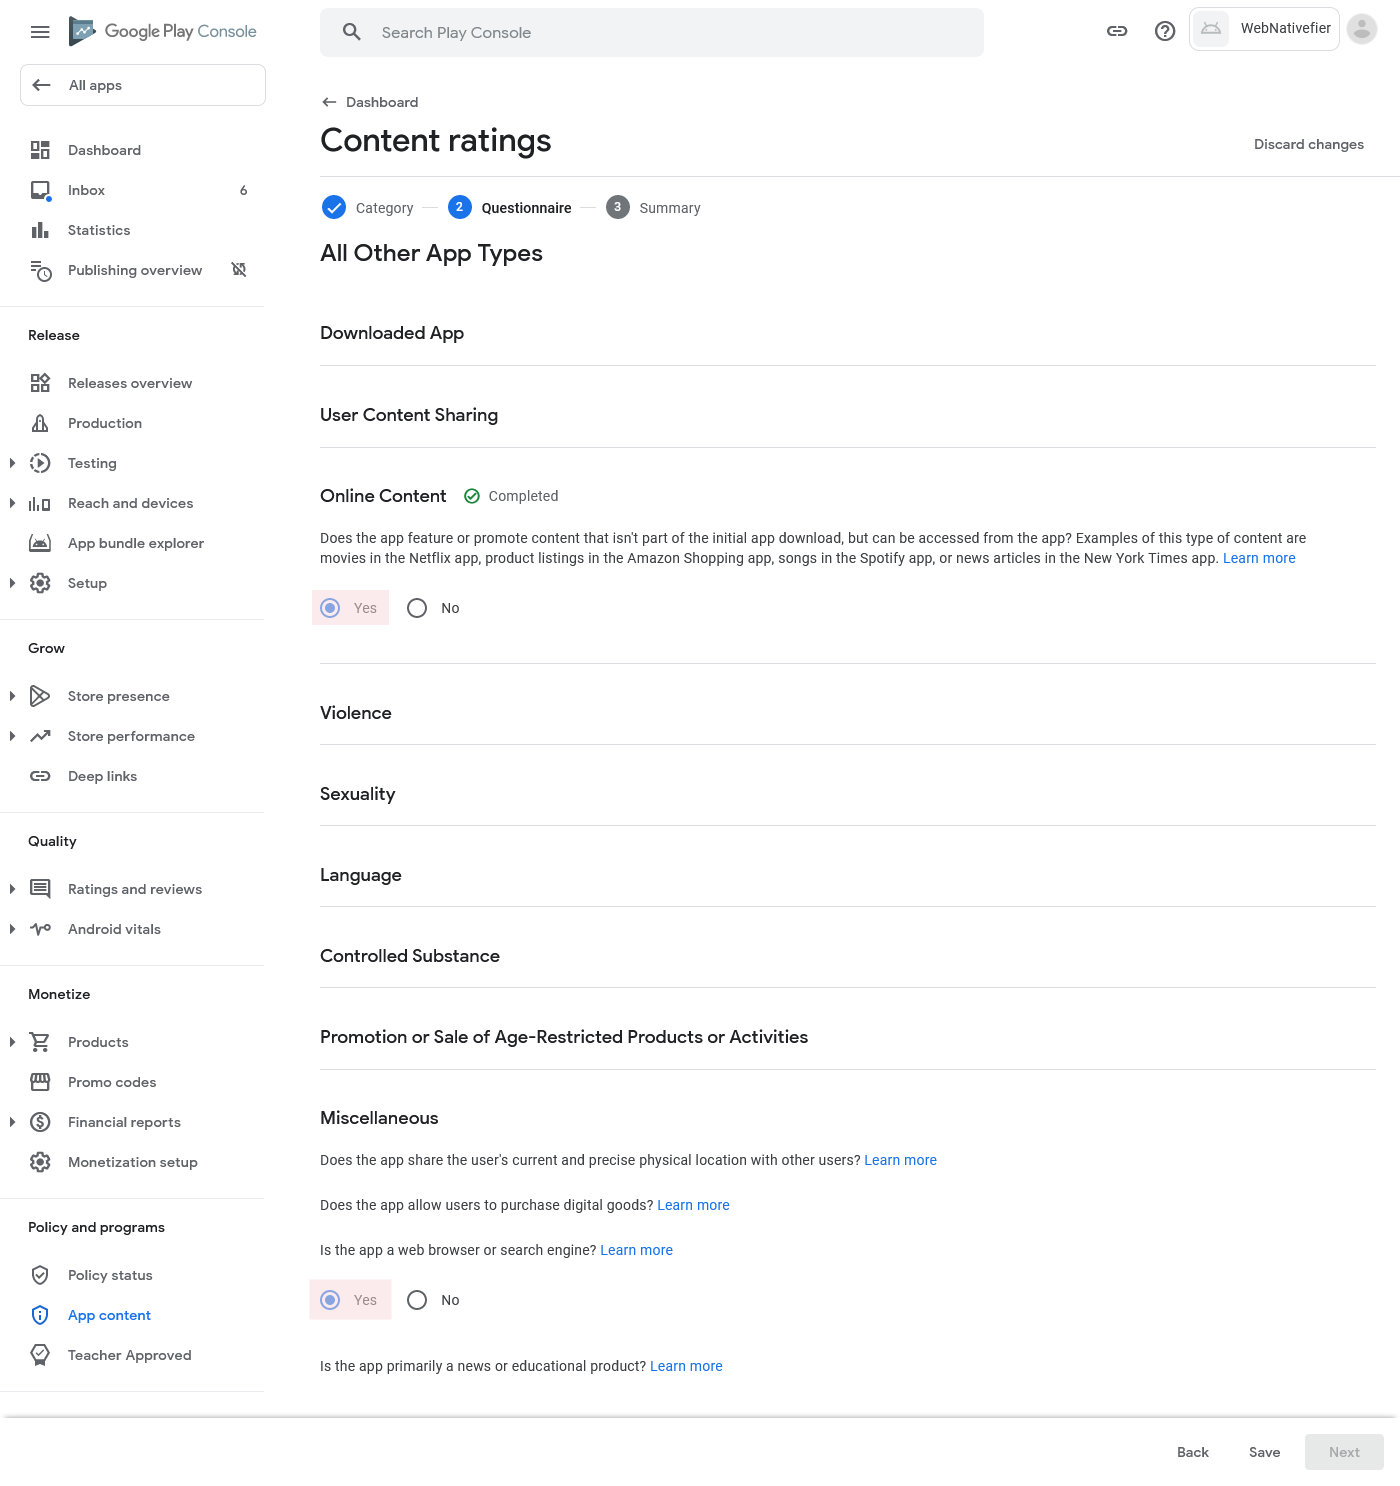
When you answer all questions in the questionnaire, press "Save" at the bottom and then press "Next".
Now you will be presented with the content rating "summary" page.
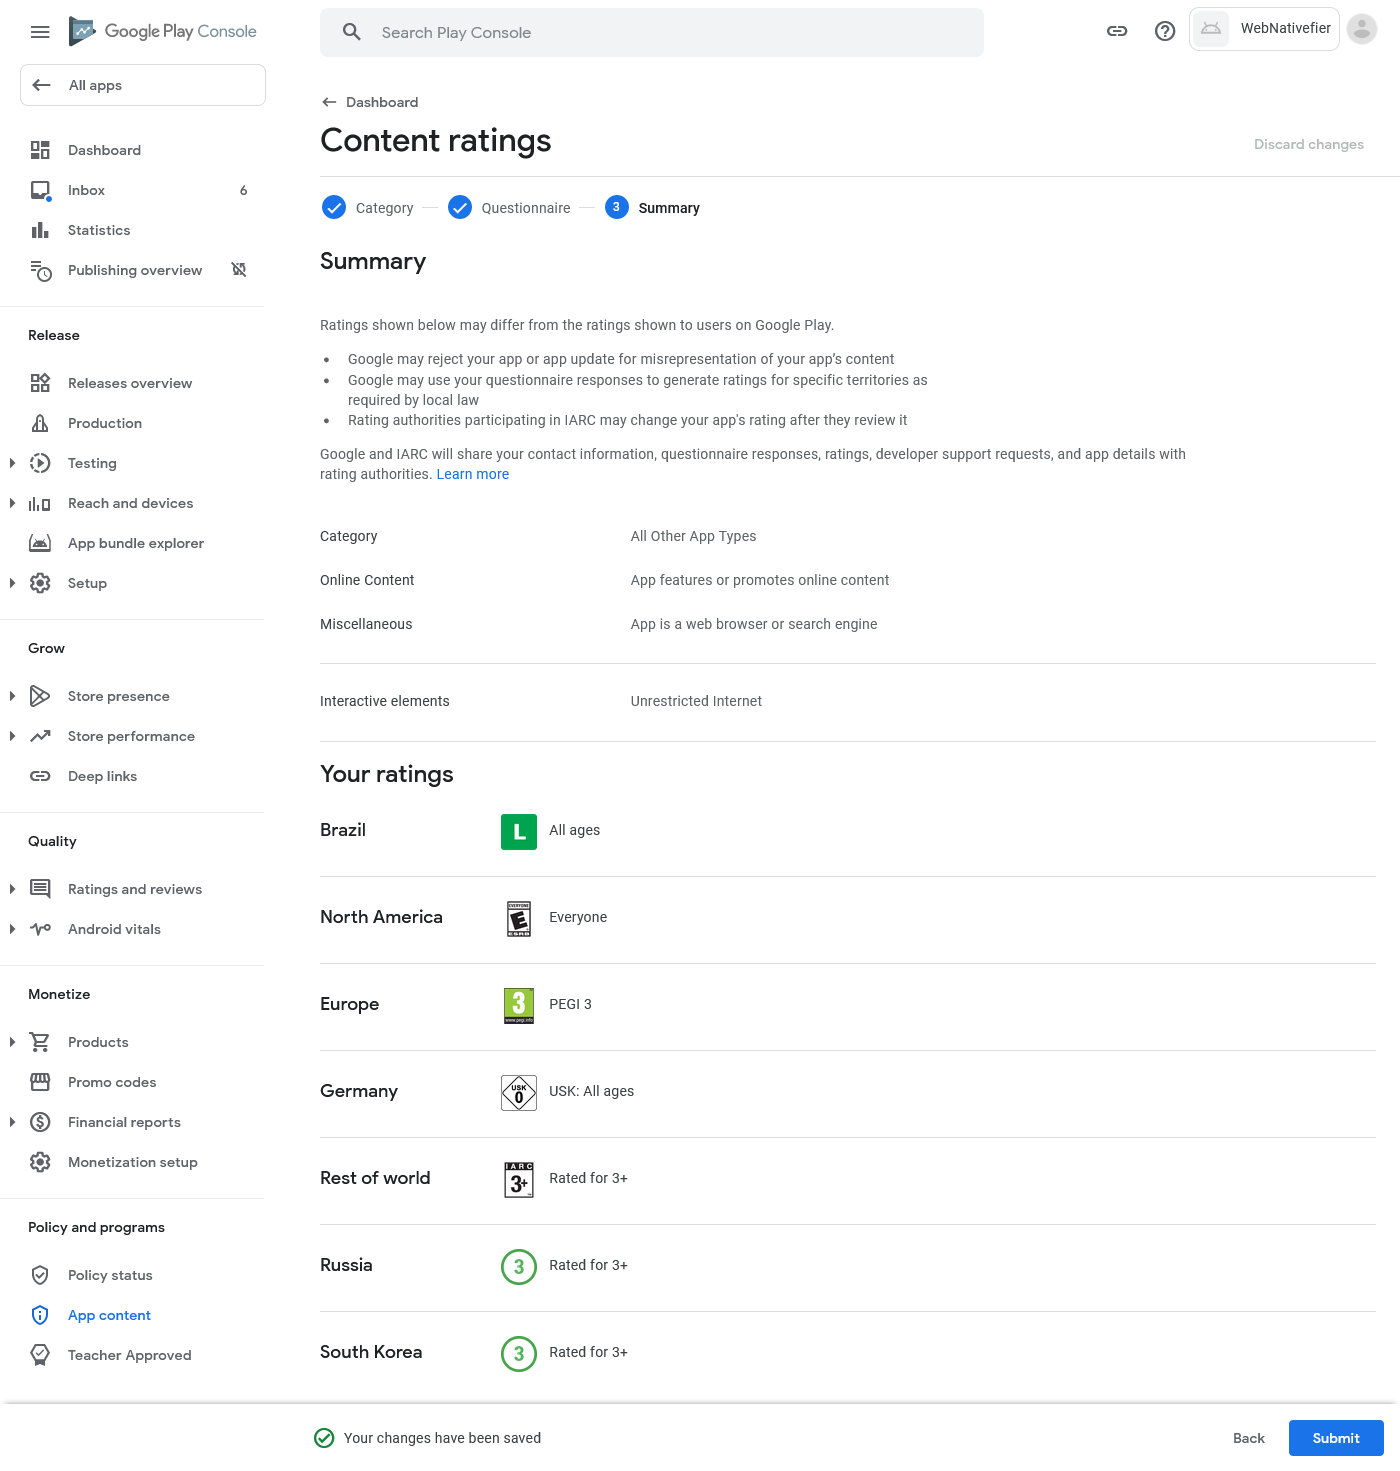
After you review the summary and make sure everything is correct, press the "Submit" button to submit the questionnaire.
Finally, you are presented with the completion page that shows you your app rating.

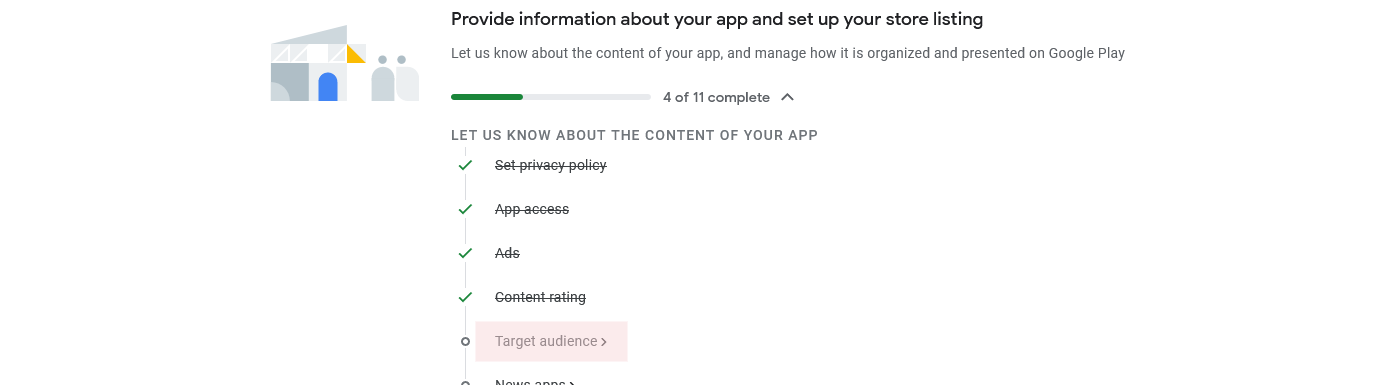
Now you can go back to the dashboard and start the next task (“Target audience”).
In this task you need to select the target age groups of your app.
The age groups for most apps created with WebNativefier are: "13-15", "16-17", "18 and over".
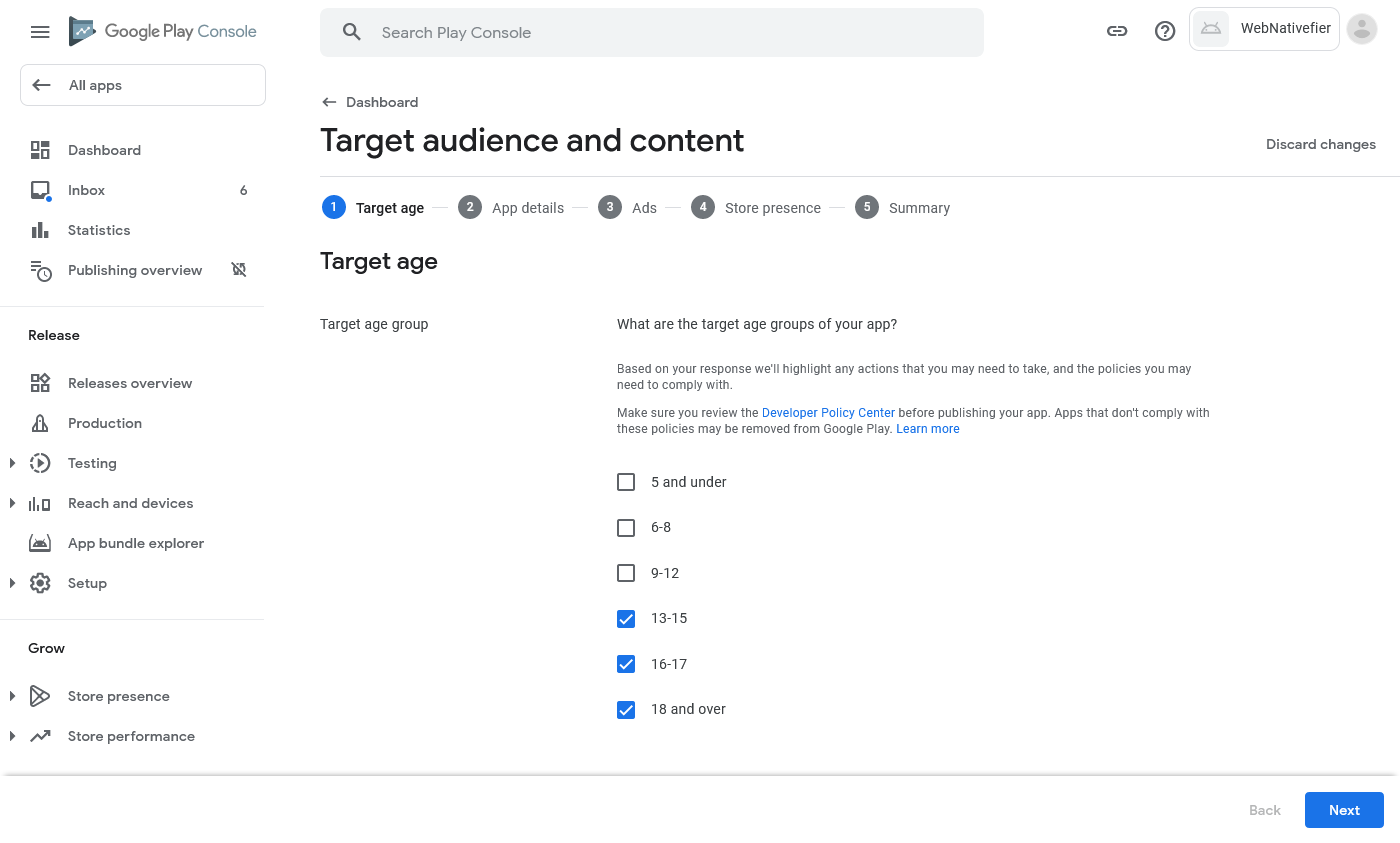
After you select all target age groups for your app, press the "Next" button to continue.
If you've only chosen audiences that are above 13 years old, on the next page you will be asked whether your store listing could unintentionally appeal to children. In most cases you can answer this question with "No". If you're in doubt, you can press the "Learn more" button to check some examples.
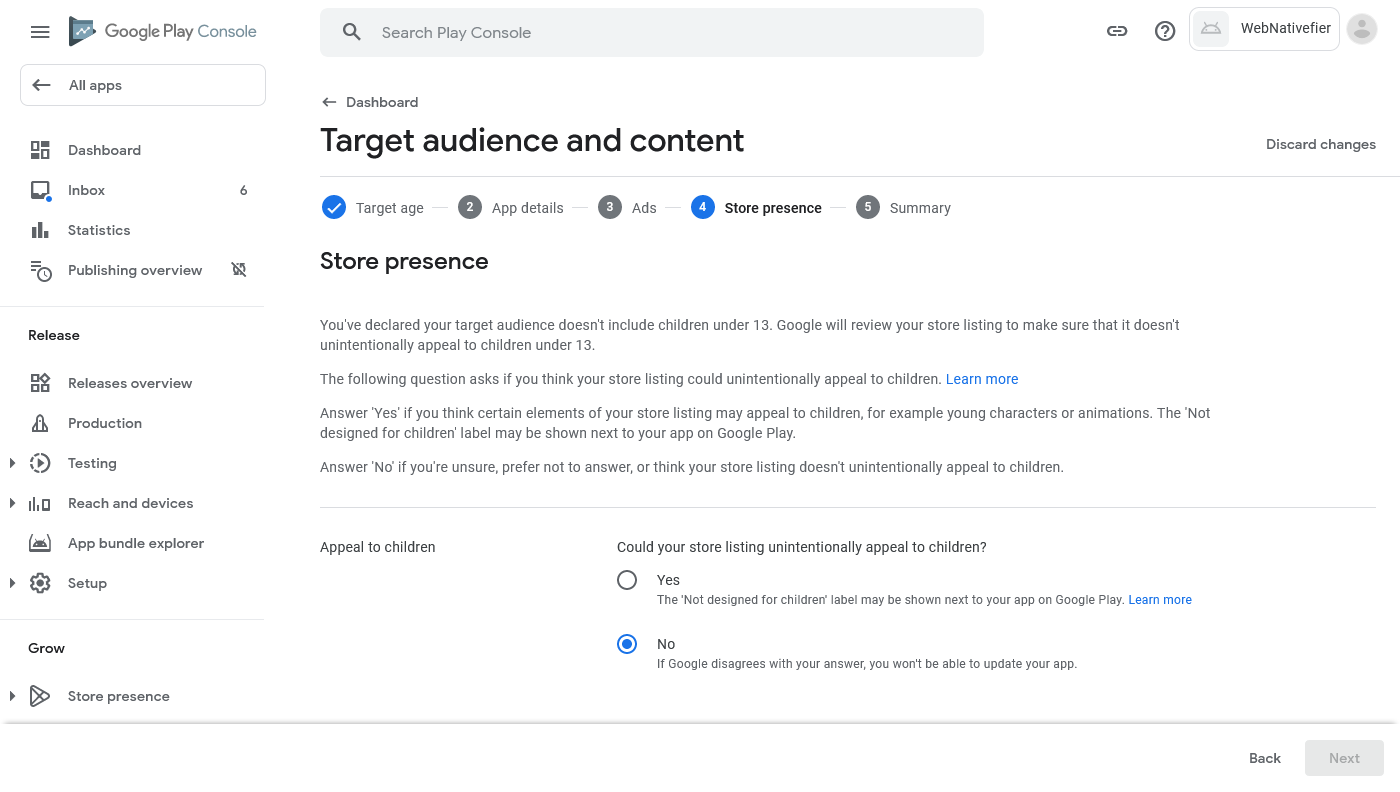
After you answer the question, press the "Next" button to continue.
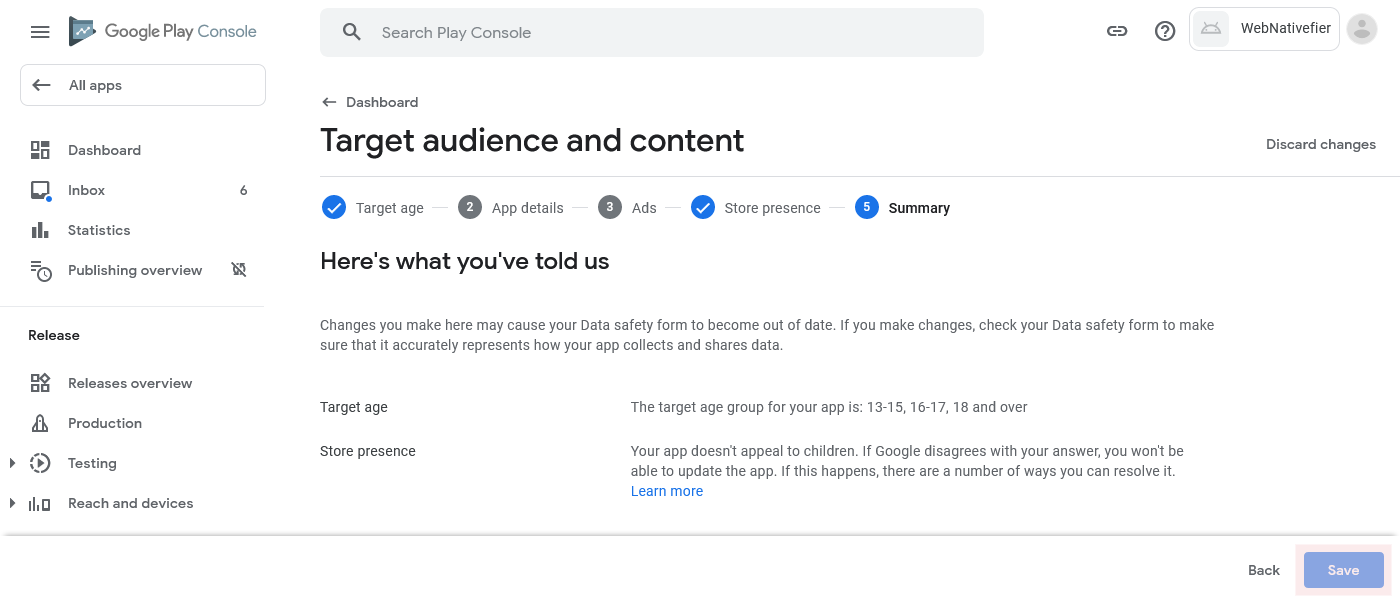
On this page you are presented with a summary for your target audience.
Review the information and press the "Save" button to finish the task.
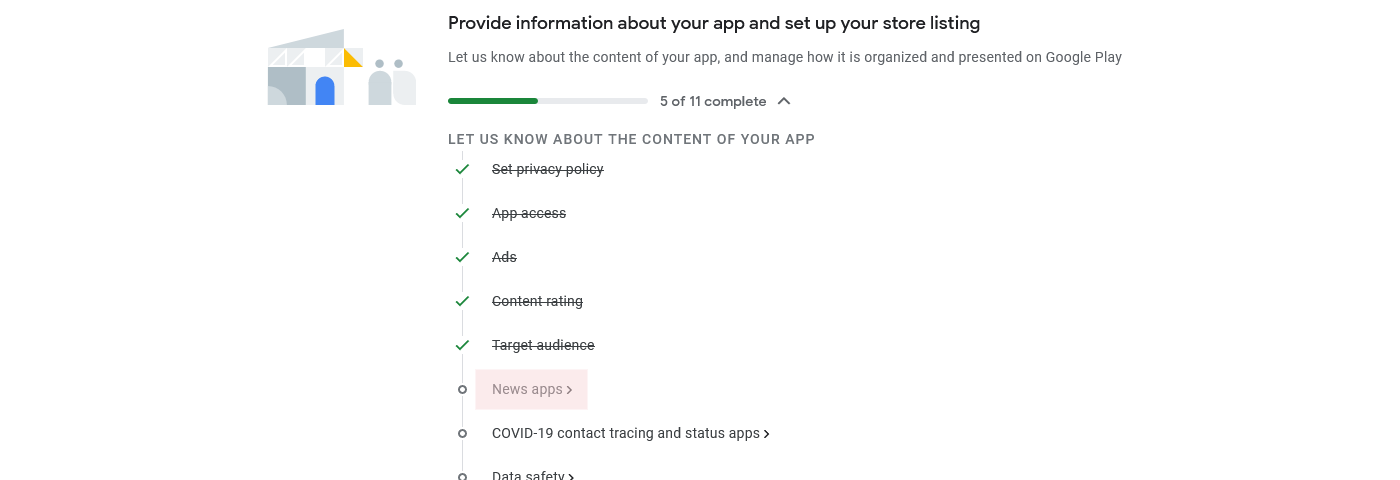
Now go back to the dashboard and start the next task ("News apps").
In this task you need to disclose whether your app is a "news app" or not.
A News app is an app that: declares itself as a "News" app in the Google Play Console, or lists itself within the “News and Magazine” category on the Google Play Store and describes itself as “news” in its app title, icon, developer name, or description (for example: "latest news", "newspaper", "local news", "daily news", etc.).
If your application falls under the "News" category, you must respond with a "Yes" and provide Google with relevant information to verify your credentials as a news publisher.
However, the majority of apps created with WebNativefier do not belong to the "News" category and can safely answer with "No".
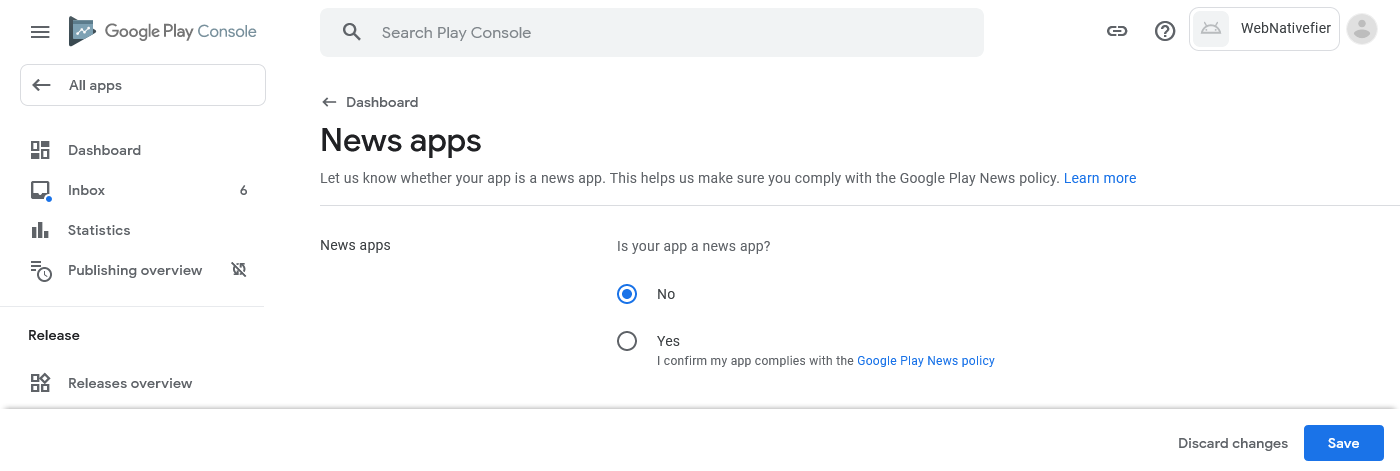
After you choose an option, press the "Save" button to finish the task.
Now go back to the dashboard and start the next task (“COVID-19 contact tracing and status apps”).
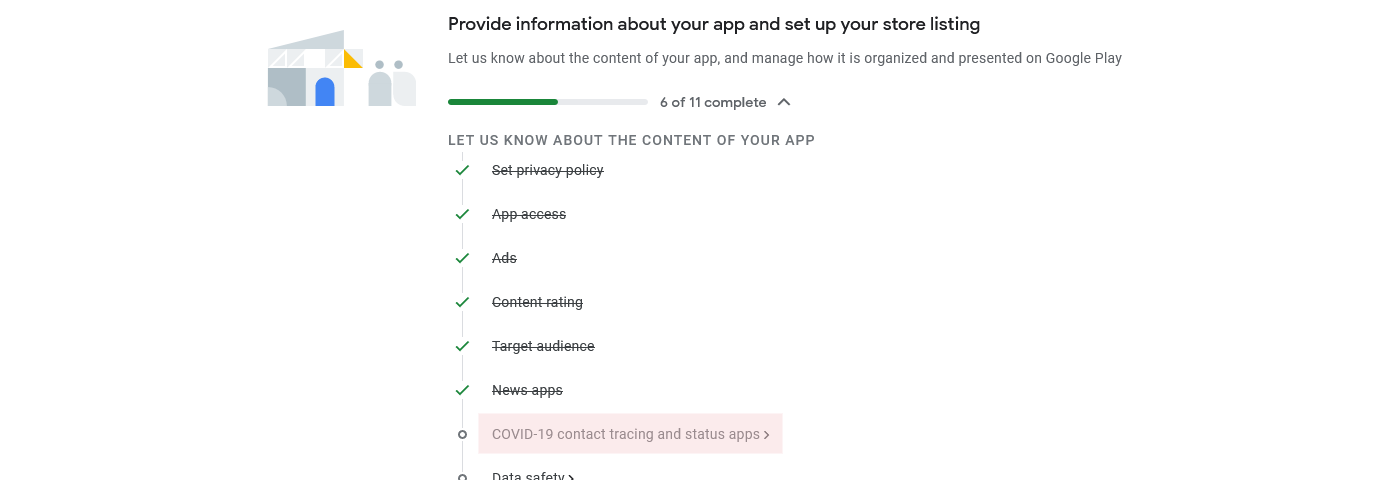
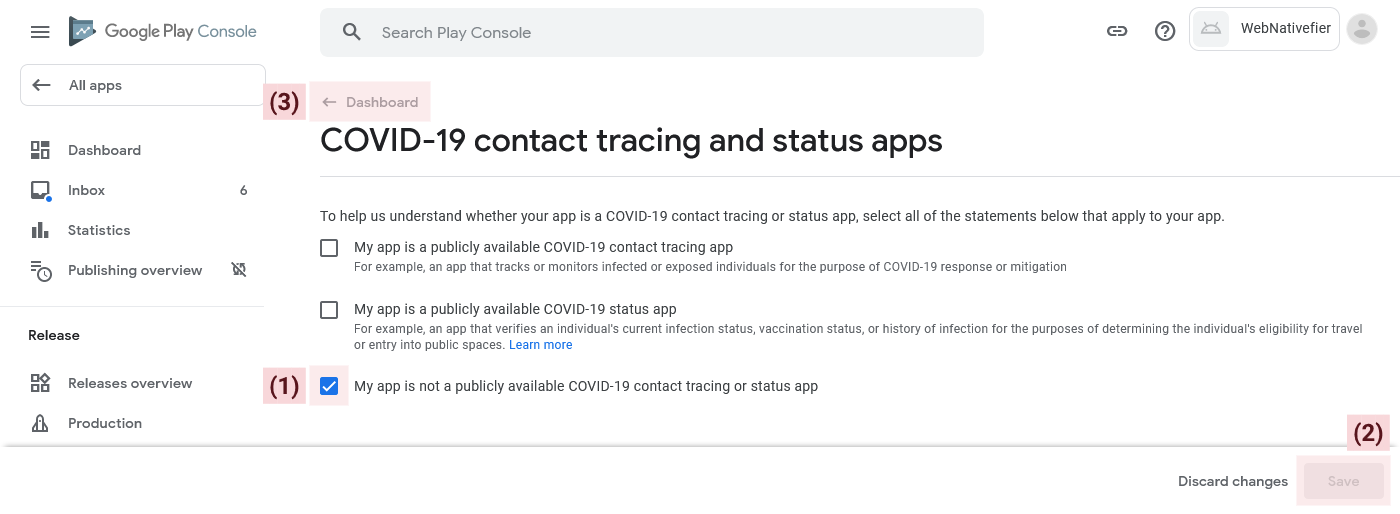
In this task you need to disclose whether your app is primarily a COVID-19 tracing or status app.
Most probably your app does not fall in this category, so you can safely choose the option: "My app is not a publicly available COVID-19 contact tracing or status app".
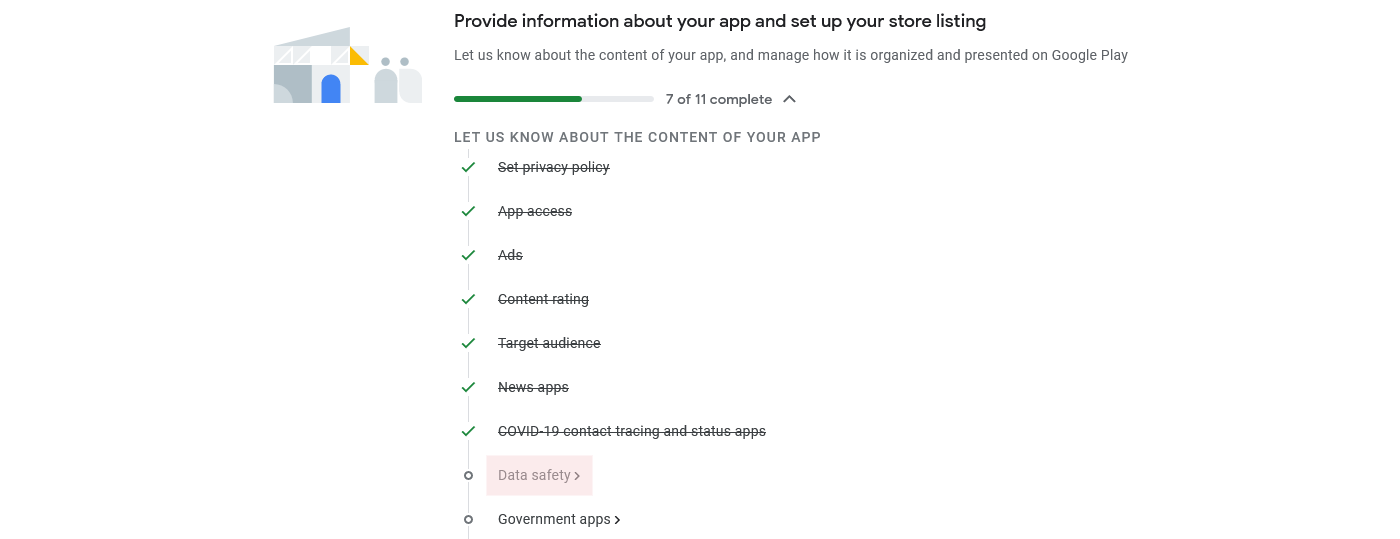
After you choose an option, press the “Save” button to finish the task, then press the "Dashboard" button to go back to the dashboard.
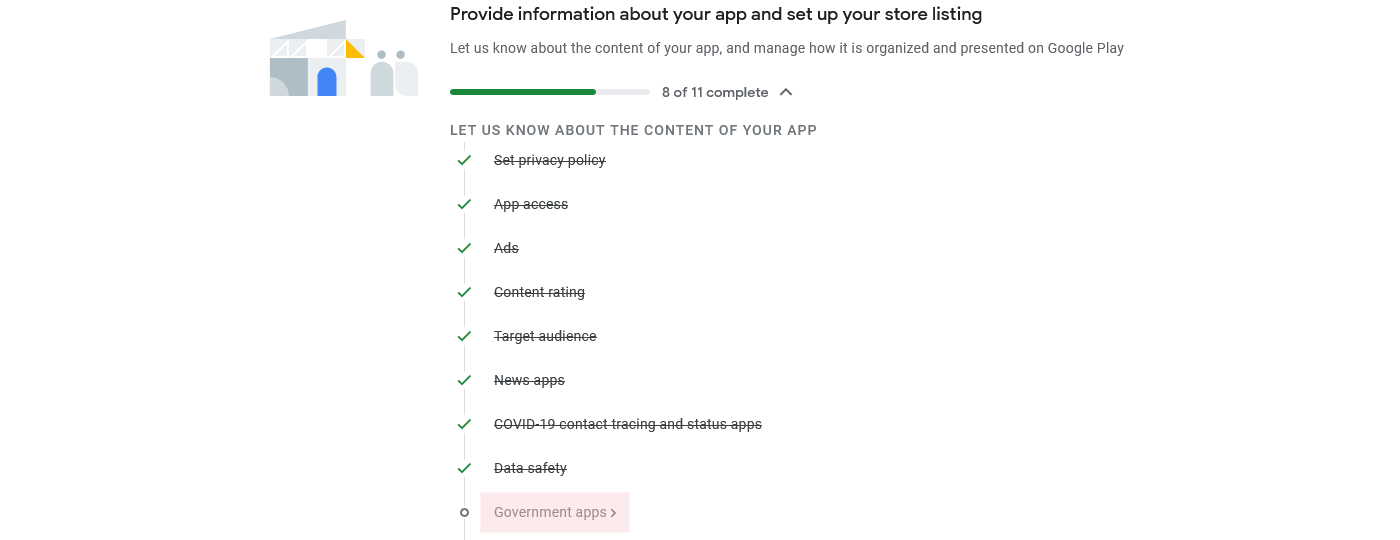
Now that you are in the dashboard, you can start the next task (“Data safety”).
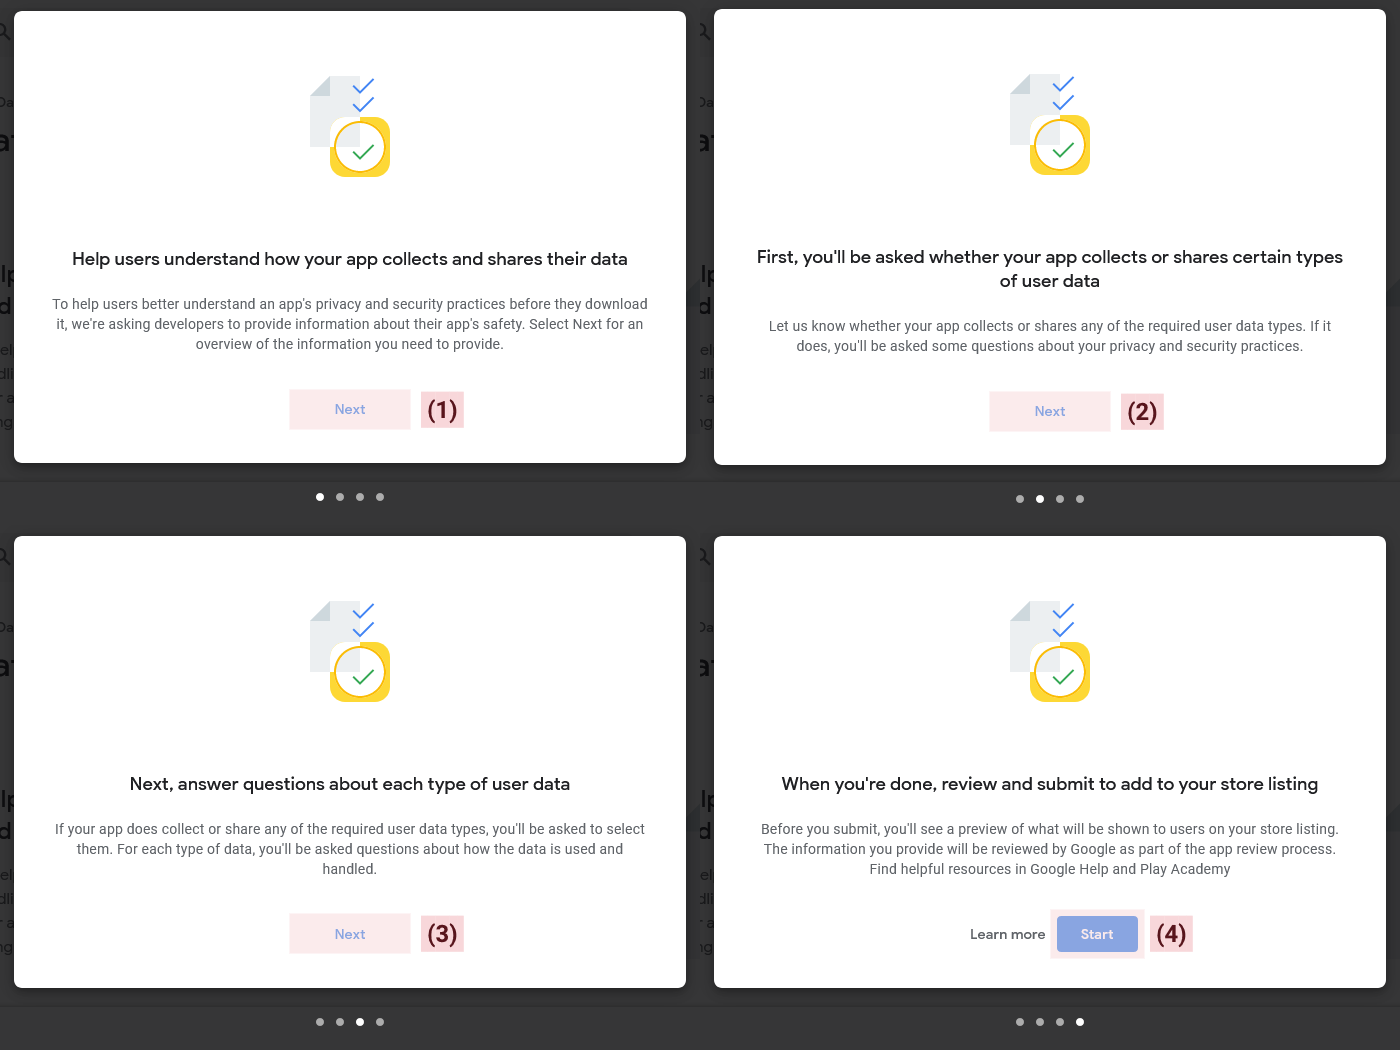
Initially, you'll be presented with a set of introductory slides that provide an overview of the task. You should read each slide, and when you reach the final one, press the "Start" button to begin the task.
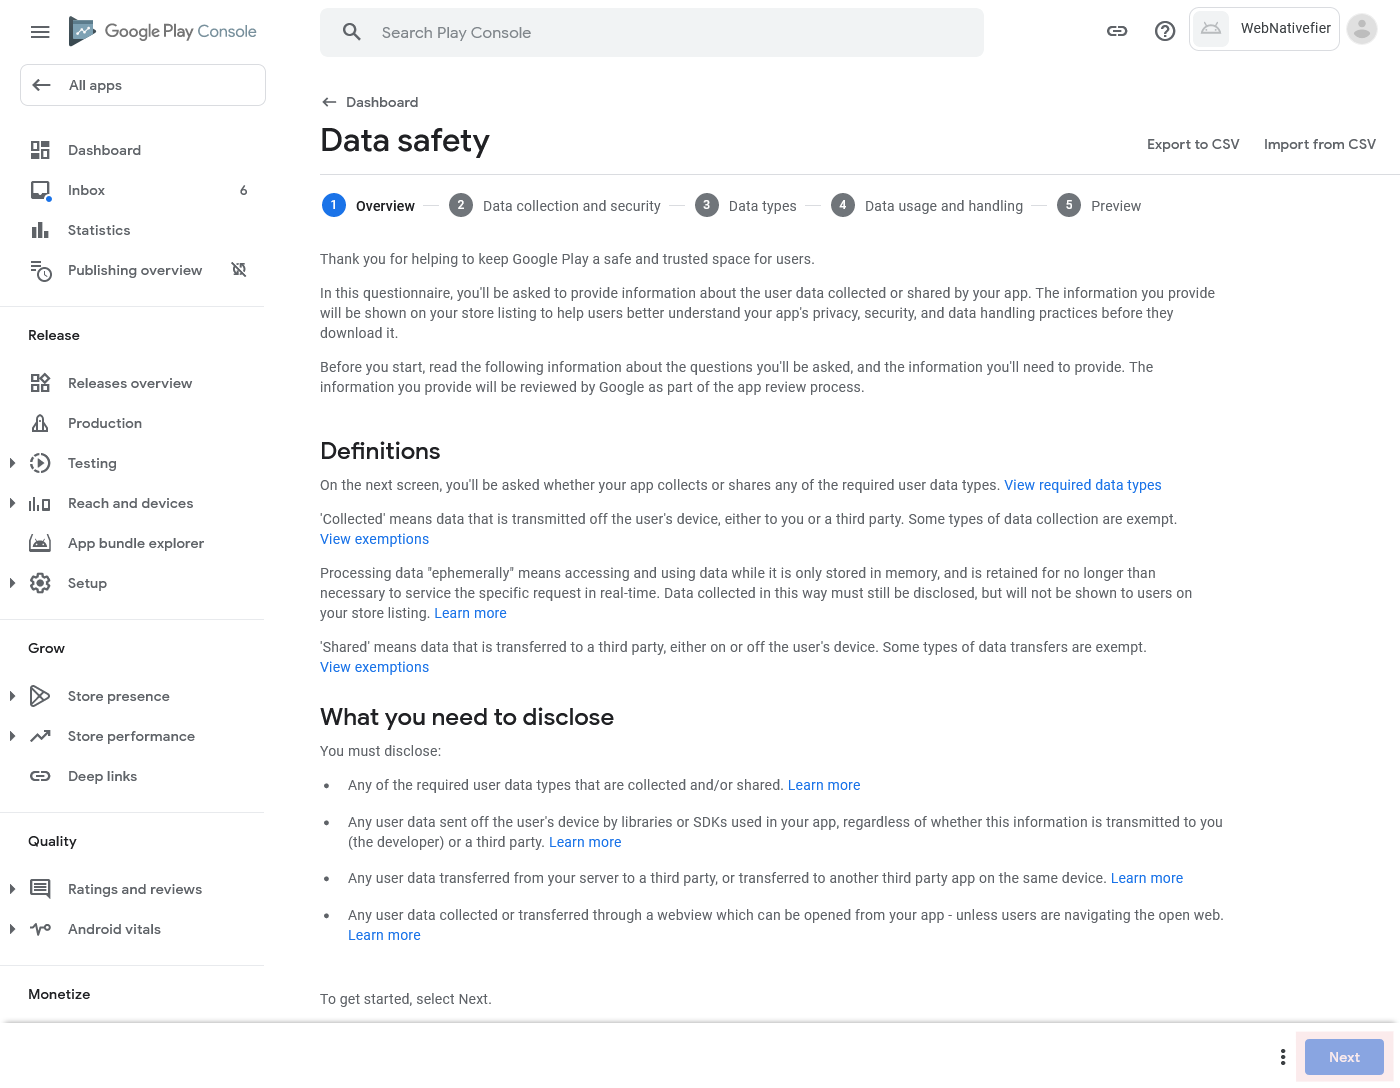
The upcoming screen will present you with details regarding the information you must disclose in the data safety questionnaire, along with explanations of certain terms that are utilized.
Please carefully read the information presented and when you are ready, press the "Next" button to start the questionnaire.
After you press “Next”, the questionnaire will start where you need to answer some questions about the data safety in your app.
Same as for the content rating task that you've already completed, in this one we must also leave the majority of the questions for you to answer on your own. There is a “Learn more” button next to each question that will give you more details about how you should answer.
Nonetheless, there are a few questions that require our attention and we will answer them below.
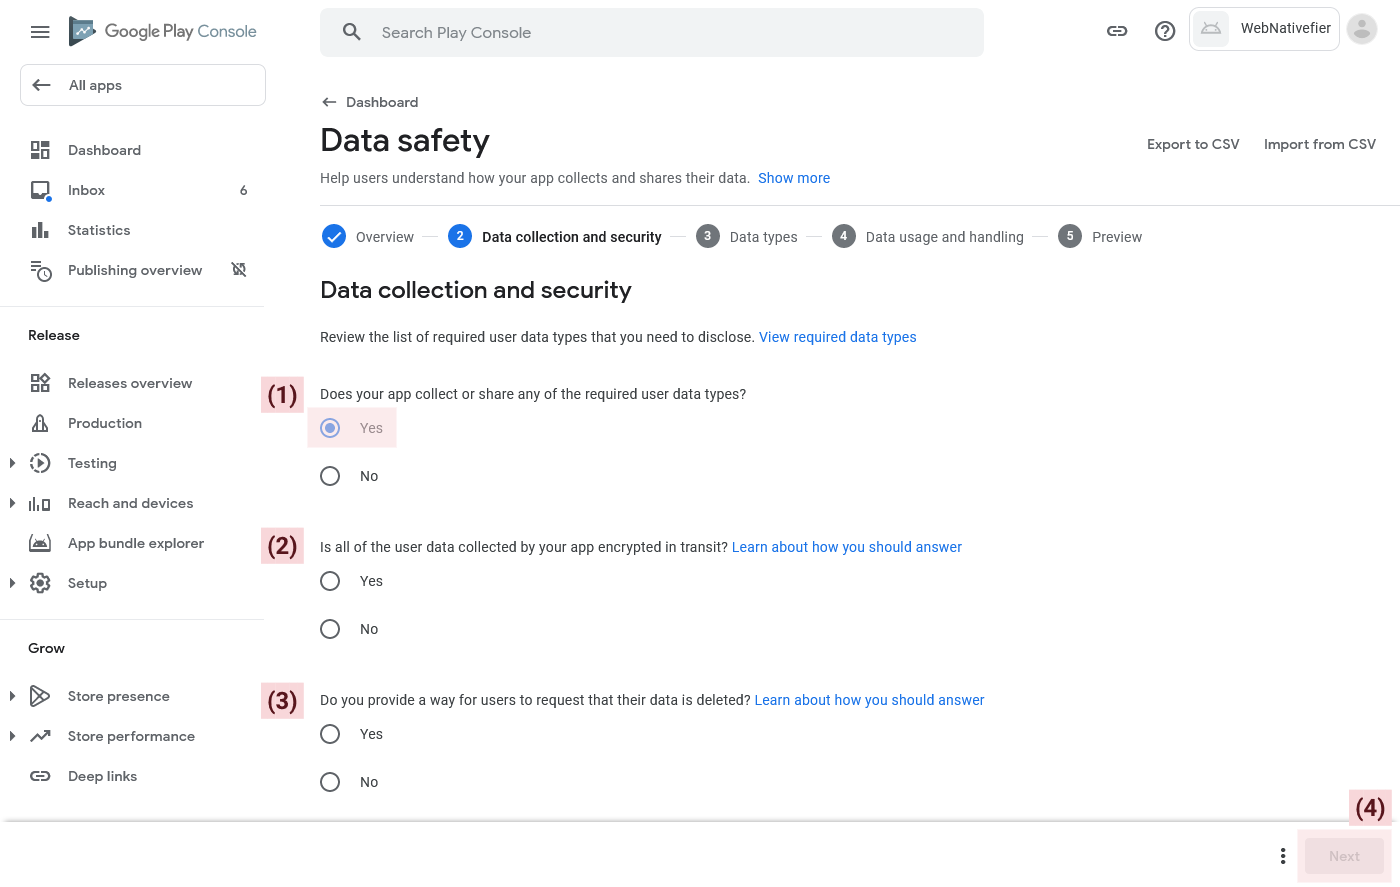
- First question on the list is "Does your app collect or share any of the required user data types?". You must answer with "YES".
- The next question will be "Is all of the user data collected by your app encrypted in transit?". If your website uses the HTTPS protocol and has a valid SSL certificate you can answer this question with "YES".
- Final question of the first part is "Do you provide a way for users to request that their data is deleted?", which you should answer on your own, based on your website/app privacy policy.
After you answer the questions, press the "Next" button to continue to the next part of the task.
In this next step, you'll need to disclose any user data types that are collected and/or shared by your app.
You must select the following user data types for all apps created with WebNativefier:
- Location
- Approximate location
- Precise location
- App info and performance
- Crash logs
- Diagnostics
- Other app performance data
- Device or other IDs
- Device or other IDs
The selection of additional data types will depend on the specific requirements of your app or website, and it's up to you to decide which data types your website uses.
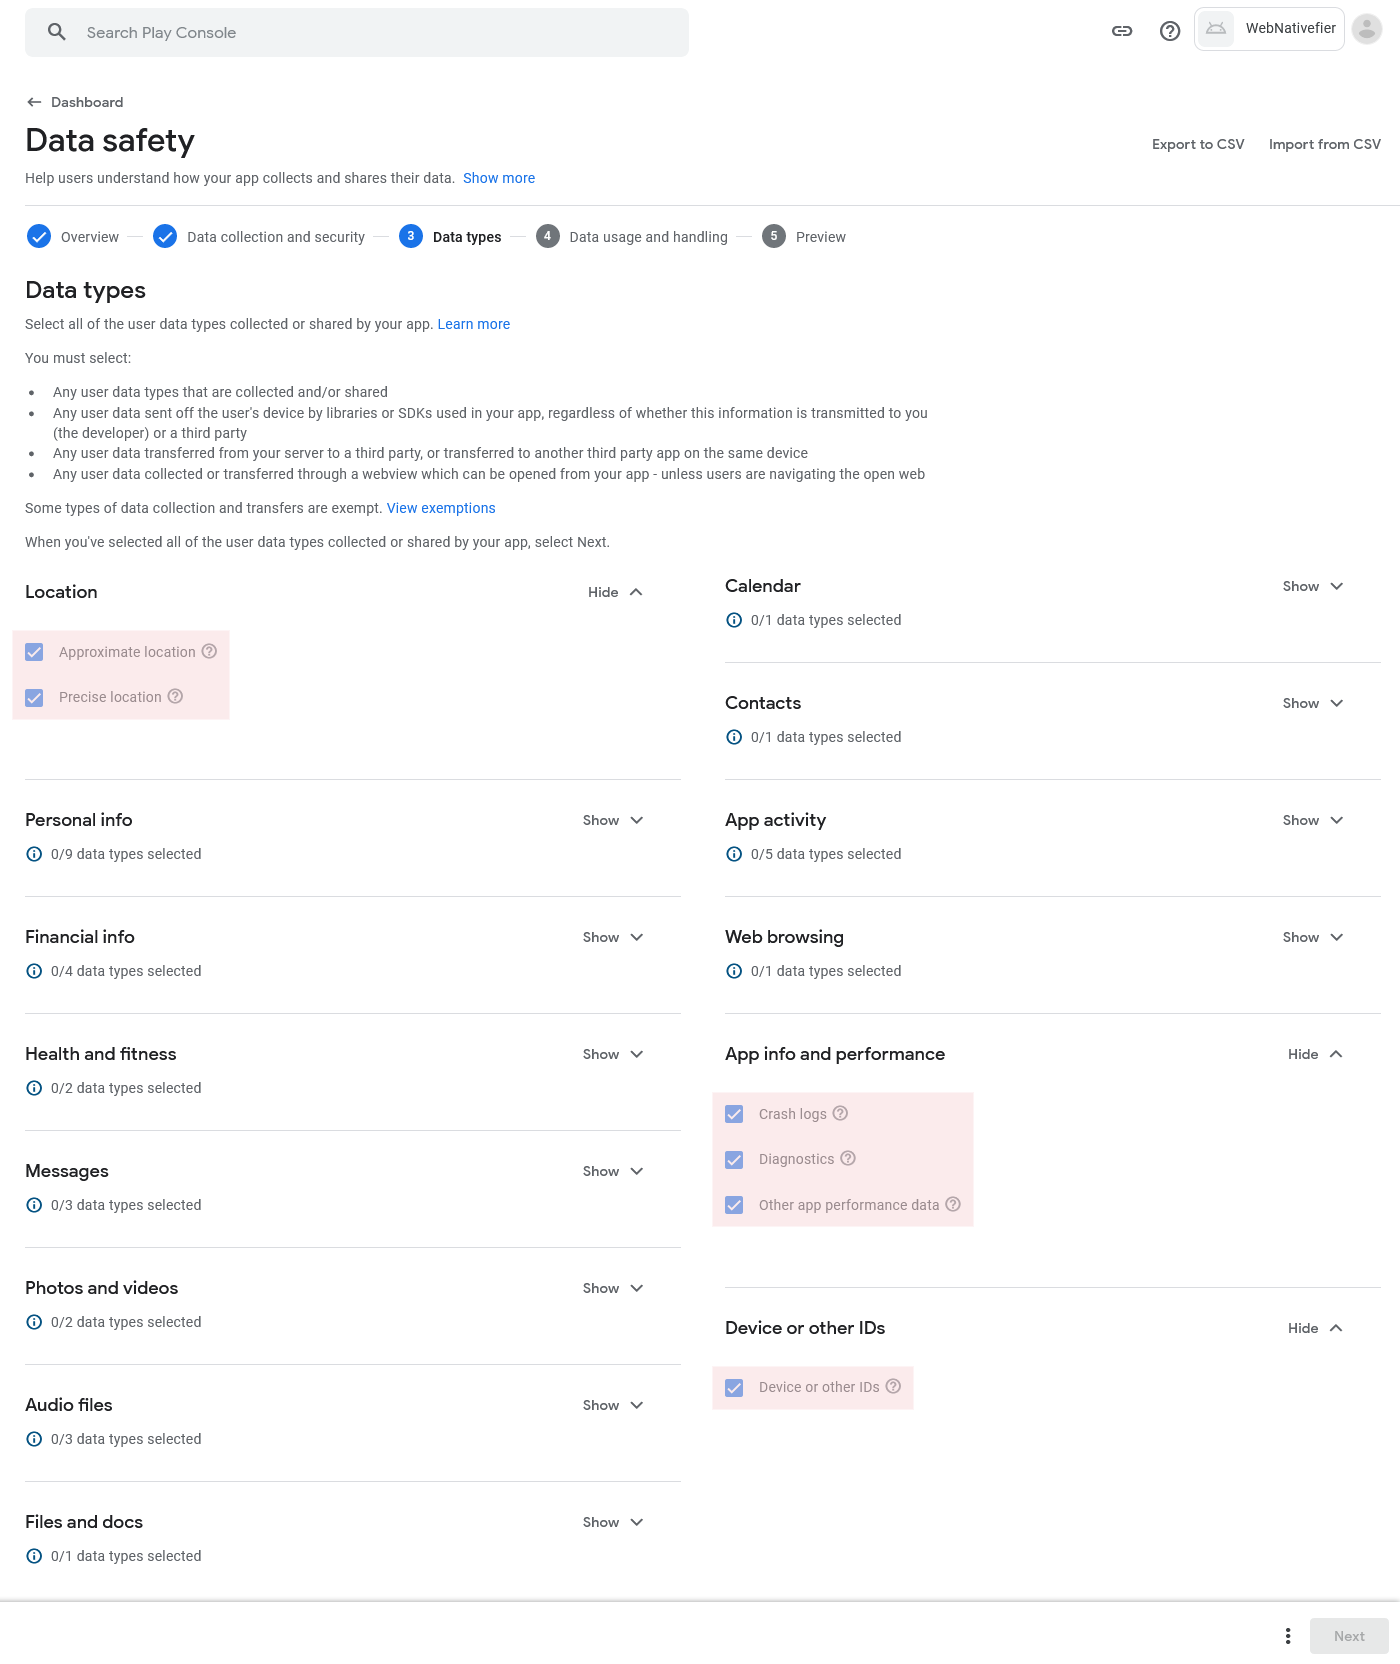
After selecting all user data types that apply for your use case, press the "Next" button.
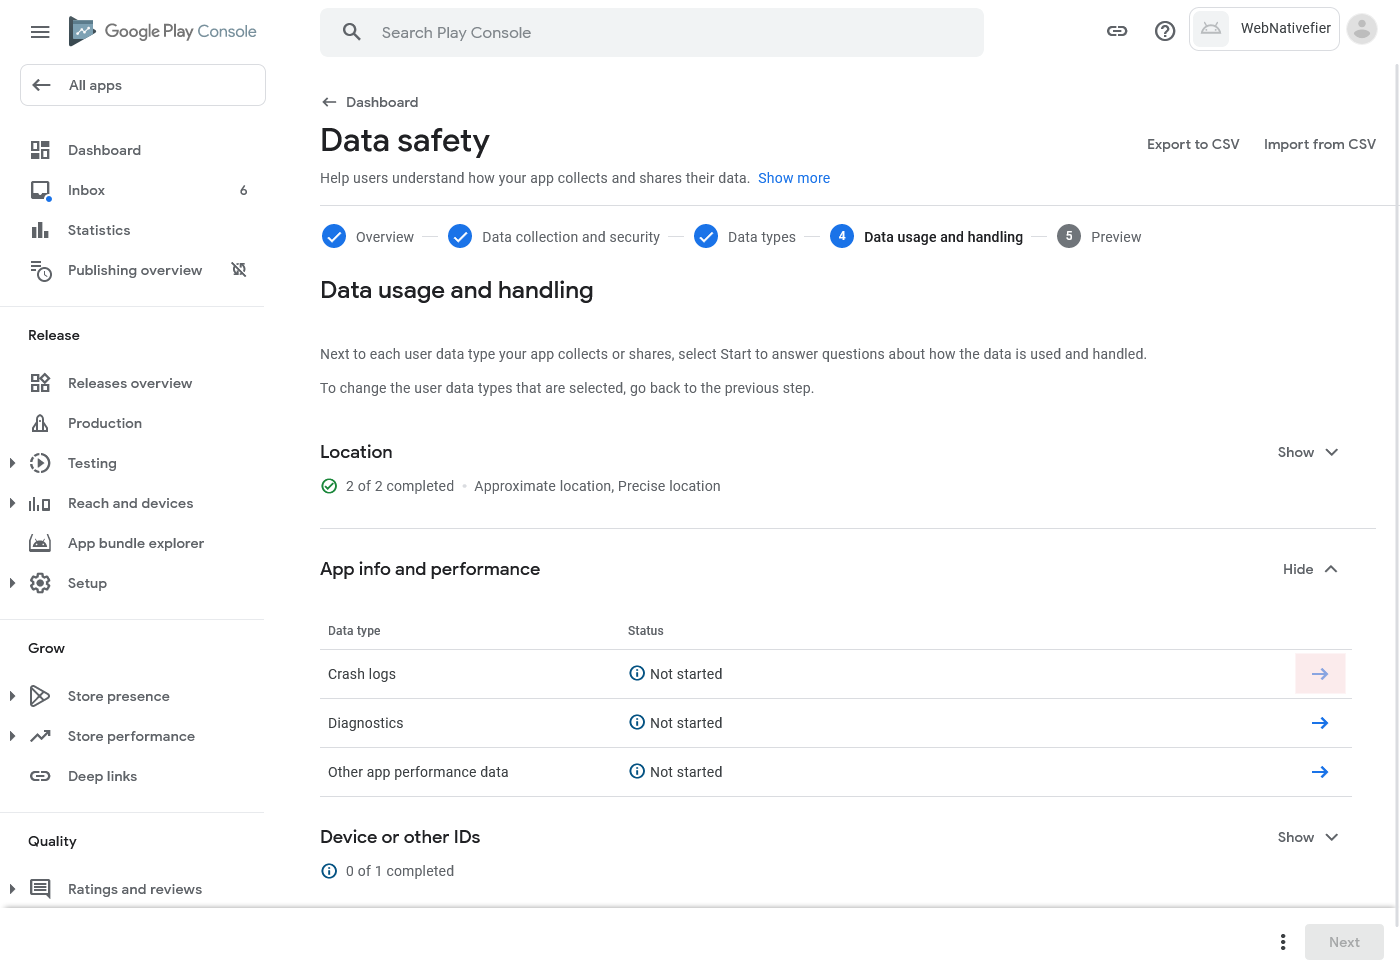
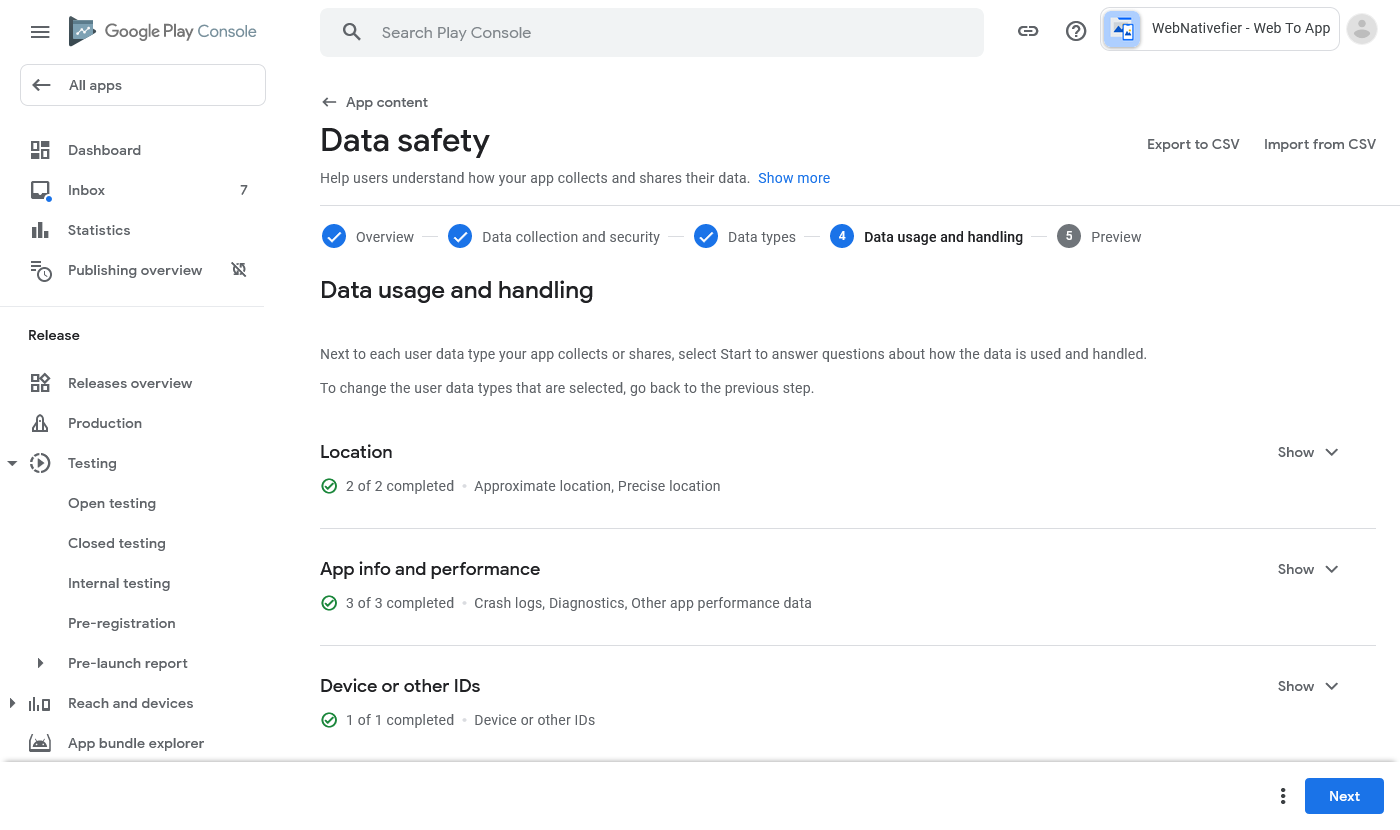
On the next page you will need to disclose how each user data type is used and handled by your app/website.
Let's start with the "Approximate location". Press the arrow at the end of the "Approximate location" line to begin.

After you press the arrow, a popup should appear.
In the popup, select "Shared" and "App functionality", then press "Save".
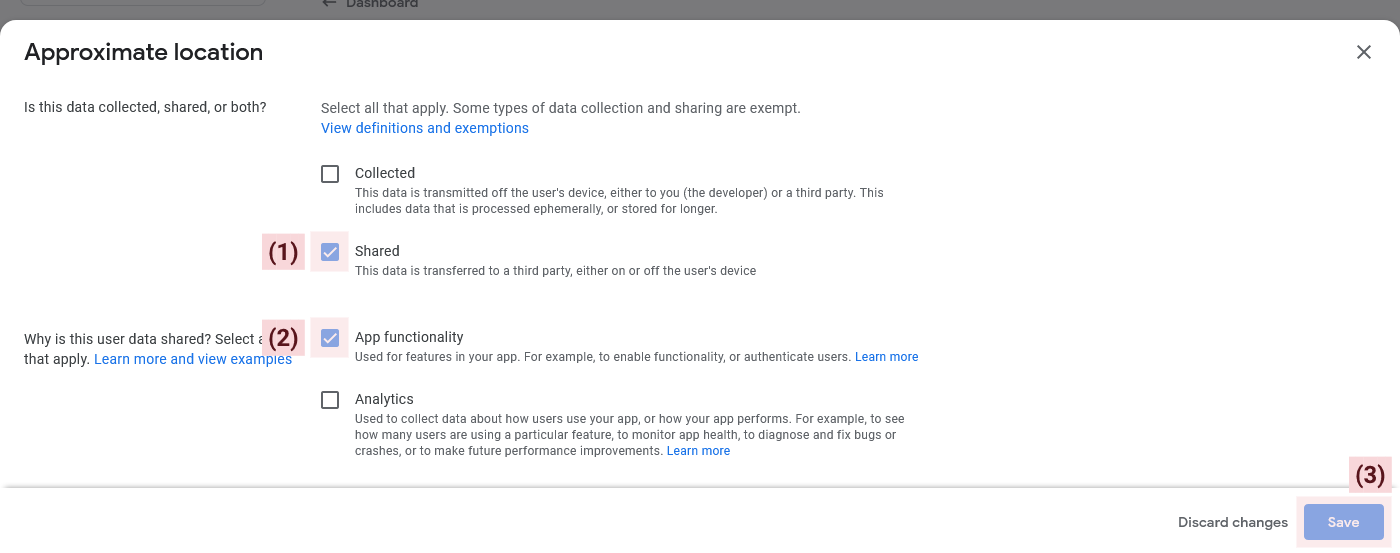
Repeat exactly the same process for the "Precise location" as well.
Now both location data types should show that they are "completed".
Next, we'll do the "App info and performance", starting with the "Crash logs". Press the arrow at the end of the "Crash logs" line to begin.
After you press the arrow, a popup should appear.
In the popup, select the following:
- "Collected"
- "Yes, this collected data is processed ephemerally"
- "Data collection is required (users can't turn off this data collection)"
- "Analytics"
then press "Save".
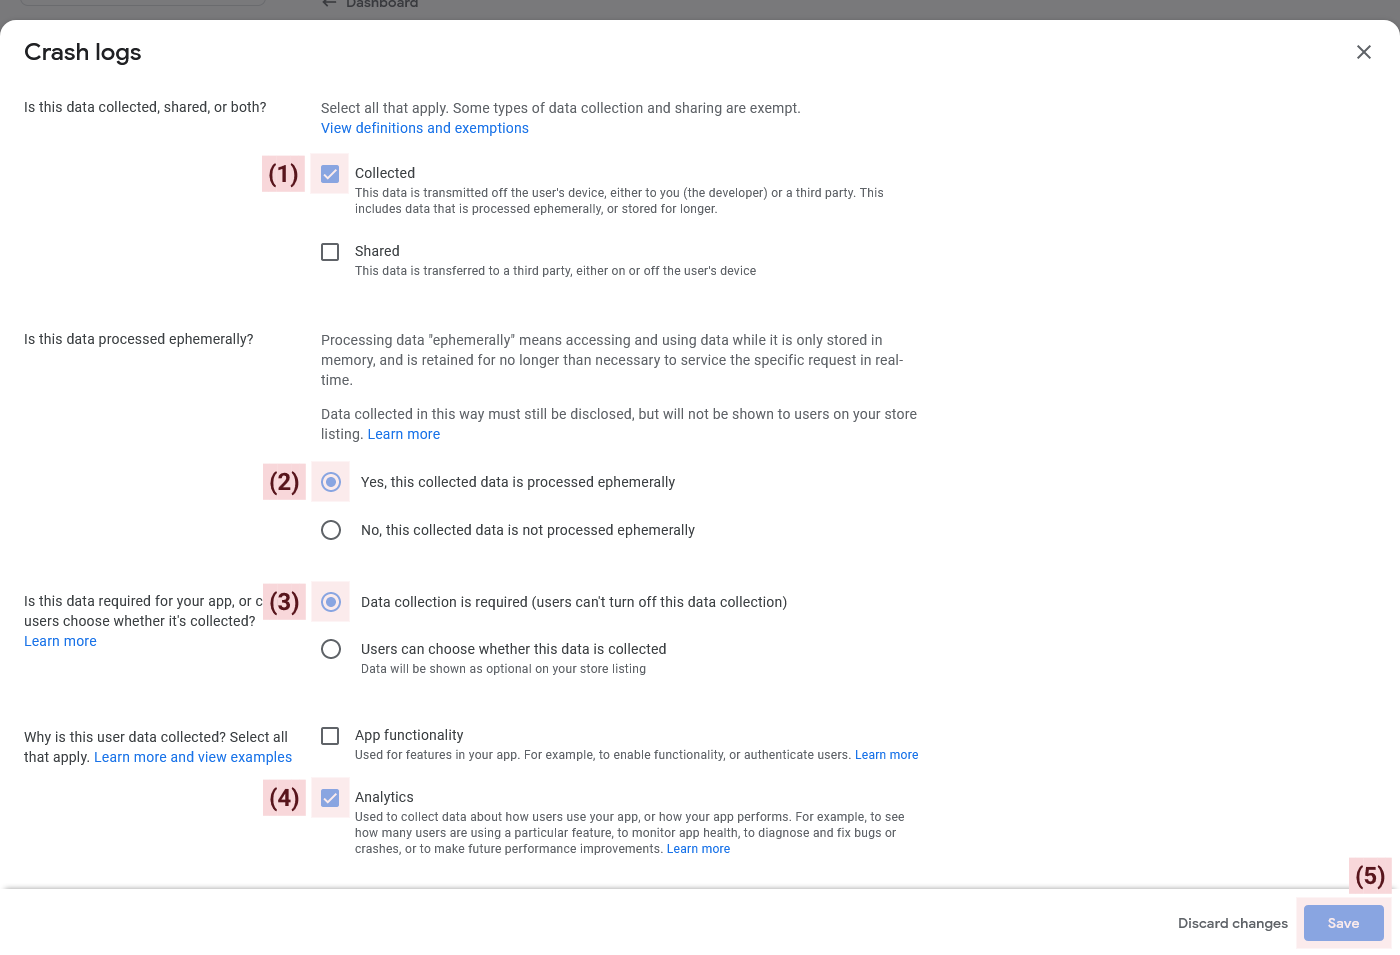
Repeat exactly the same process for the "Diagnostics" and "Other app performance data" as well.
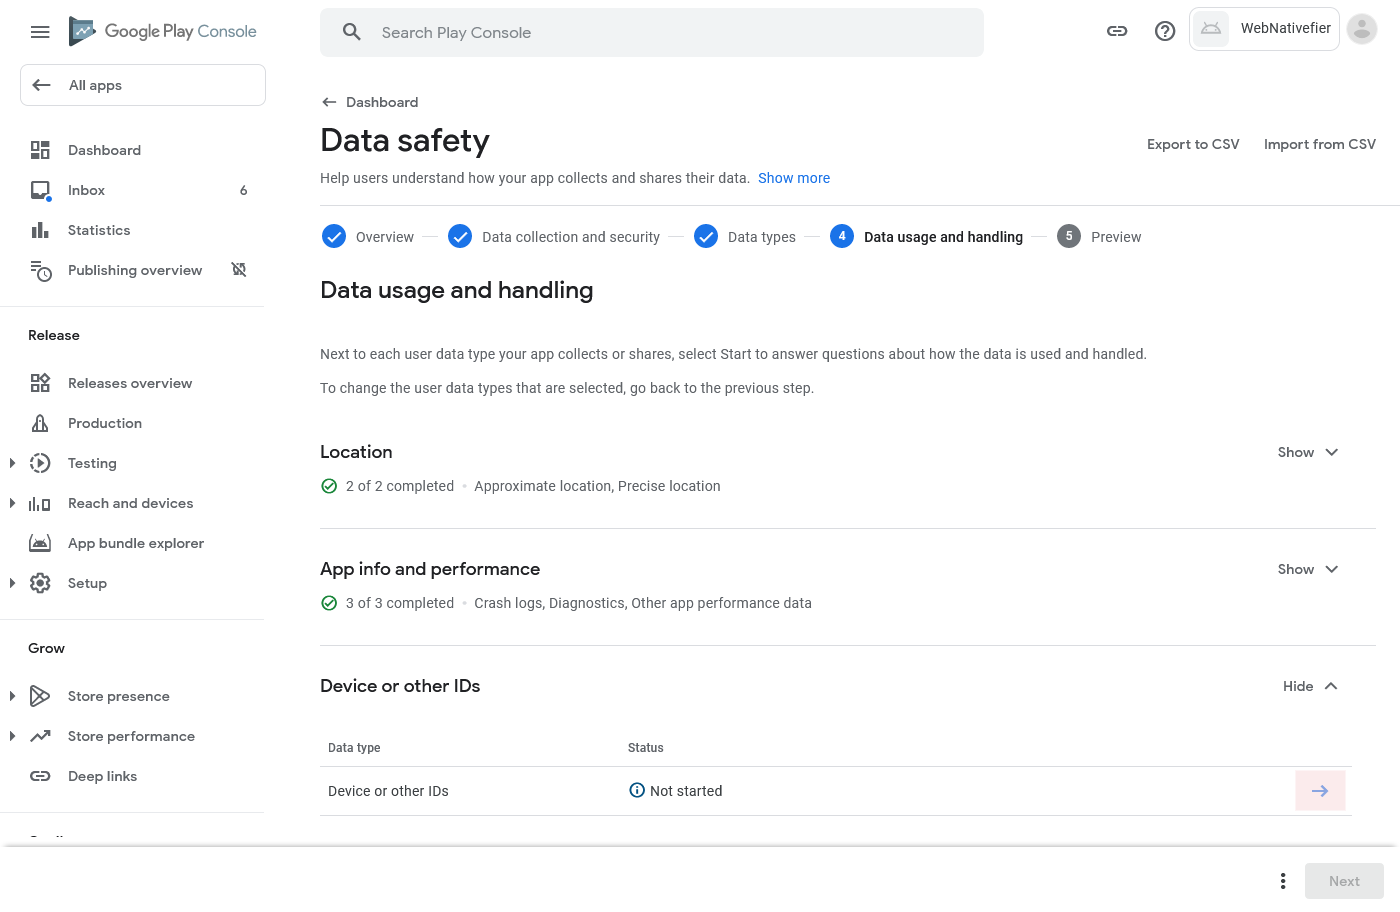
Now all three "app info and performance" data types should show that they are "completed".
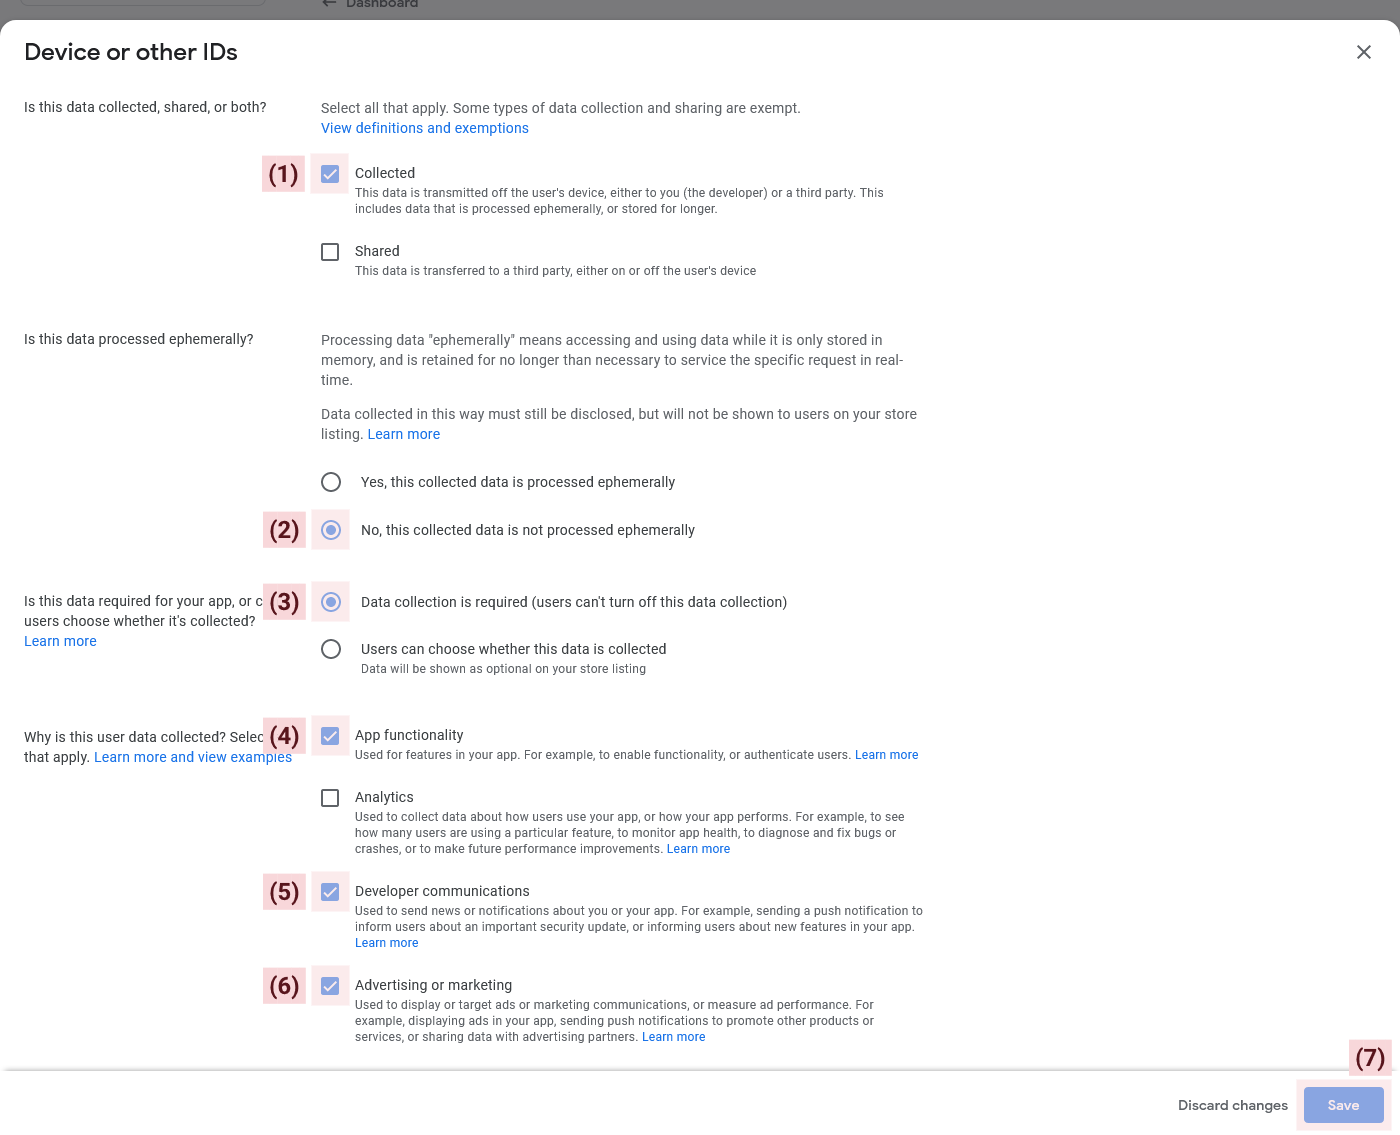
Next, we'll do the "Device or other IDs" data type. Press the arrow at the end of the line to begin.
After you press the arrow, a popup should appear.
In the popup, select the following:
- "Collected"
- "No, this collected data is not processed ephemerally"
- "Data collection is required (users can't turn off this data collection)"
- "App functionality"
- "Developer communication"
- "Advertising or marketing"
then press "Save".
If you have also selected any other data types, you'll need to disclose how you use and handle those types as well.
When you're done, press the "Next" button to continue.
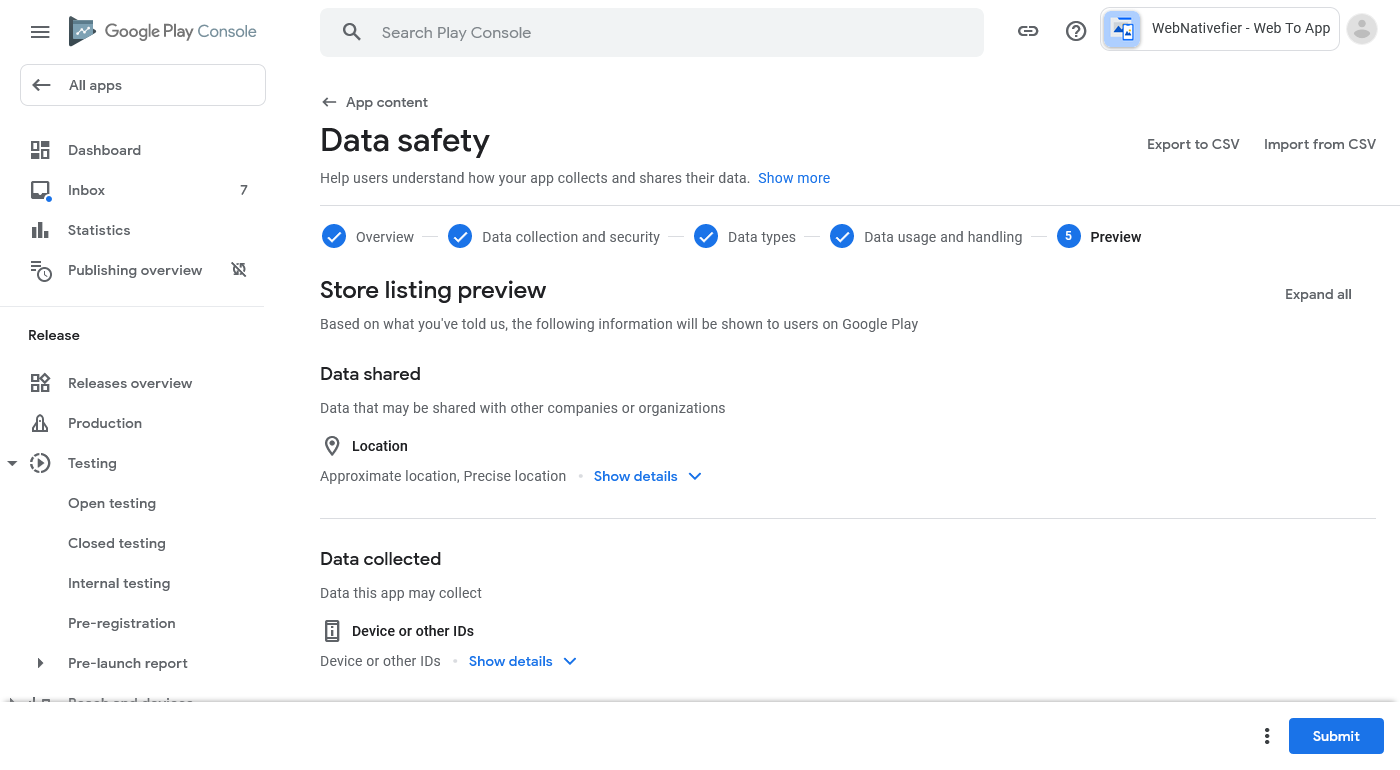
At the next screen, you are presented with a preview of all data types that you have selected.
Kindly double-check the information displayed on the page to ensure its accuracy, and then click the "Submit" button to complete the task.
After you submit the data safety task, press the "Dashboard" button to go back to the dashboard, then start the next task ("Government apps").
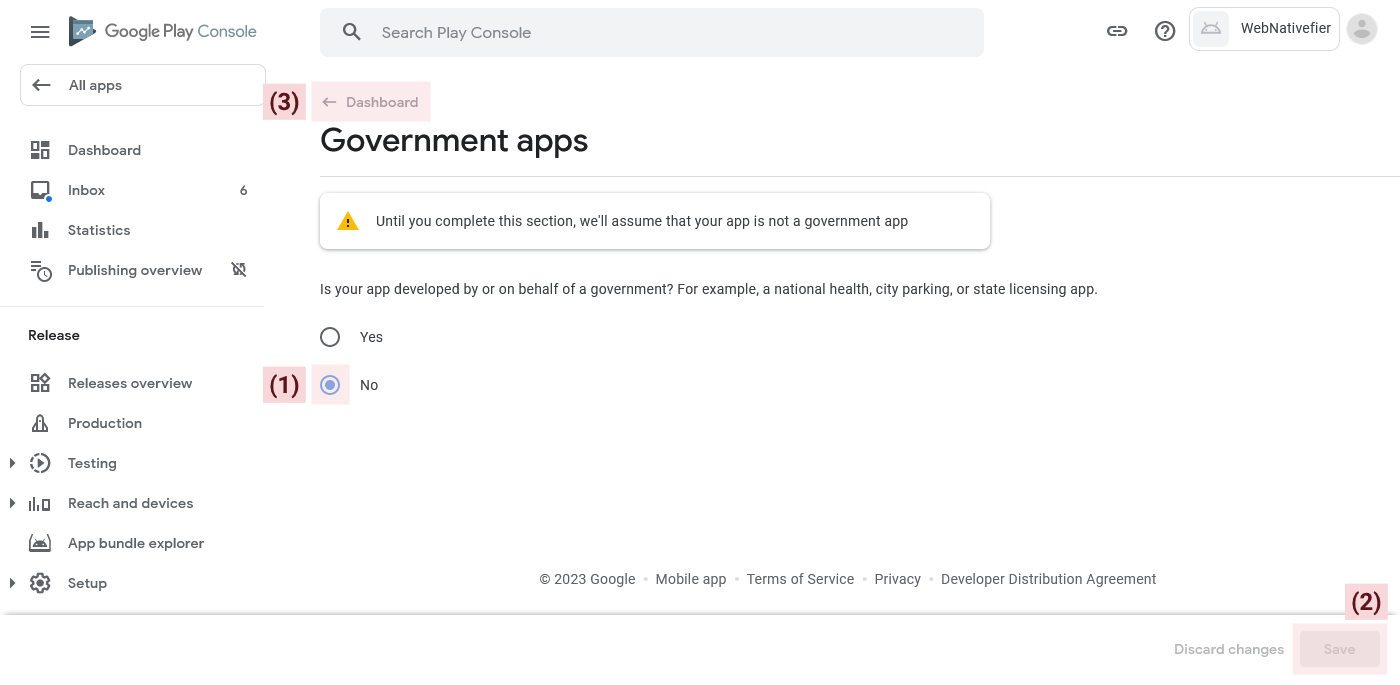
In this task you just need to answer whether your app is a government app or not. Most probably the answer to this question will be "NO".
After you choose an option, press the “Save” button to finish the task, then press the “Dashboard” button to go back to the dashboard.
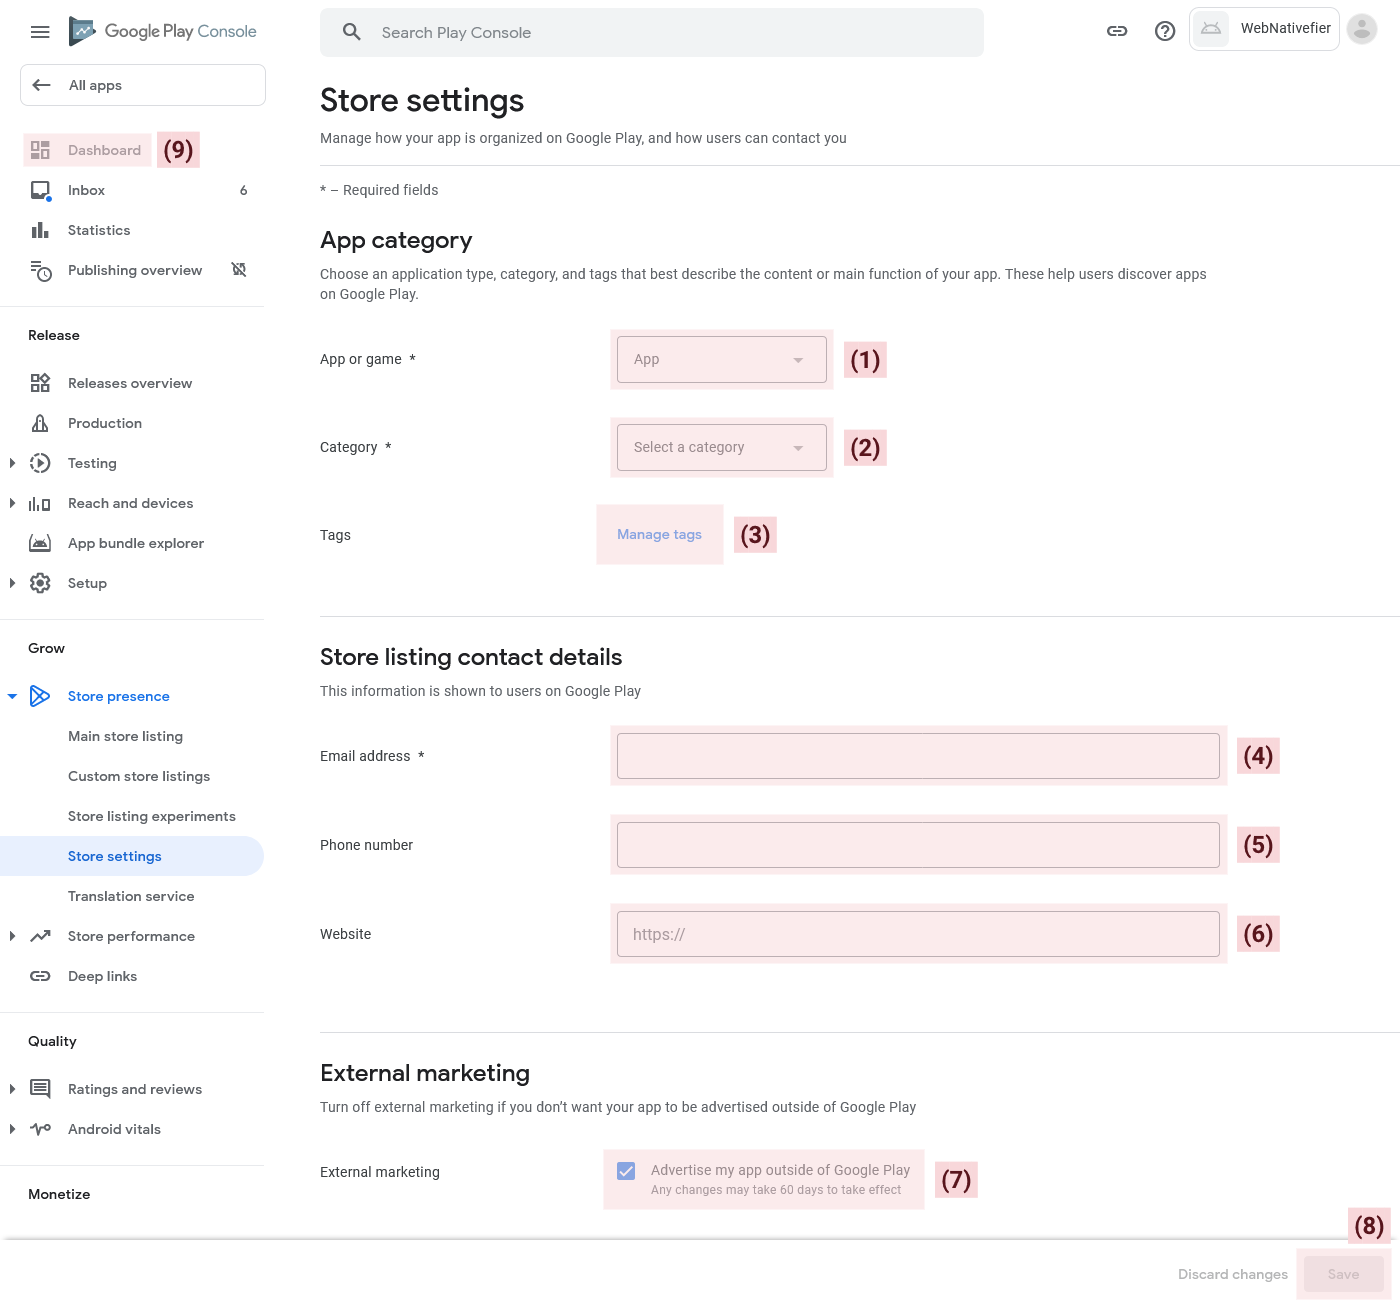
Once you're in the dashboard, start the next task (“Select an app category and provide contact details”).
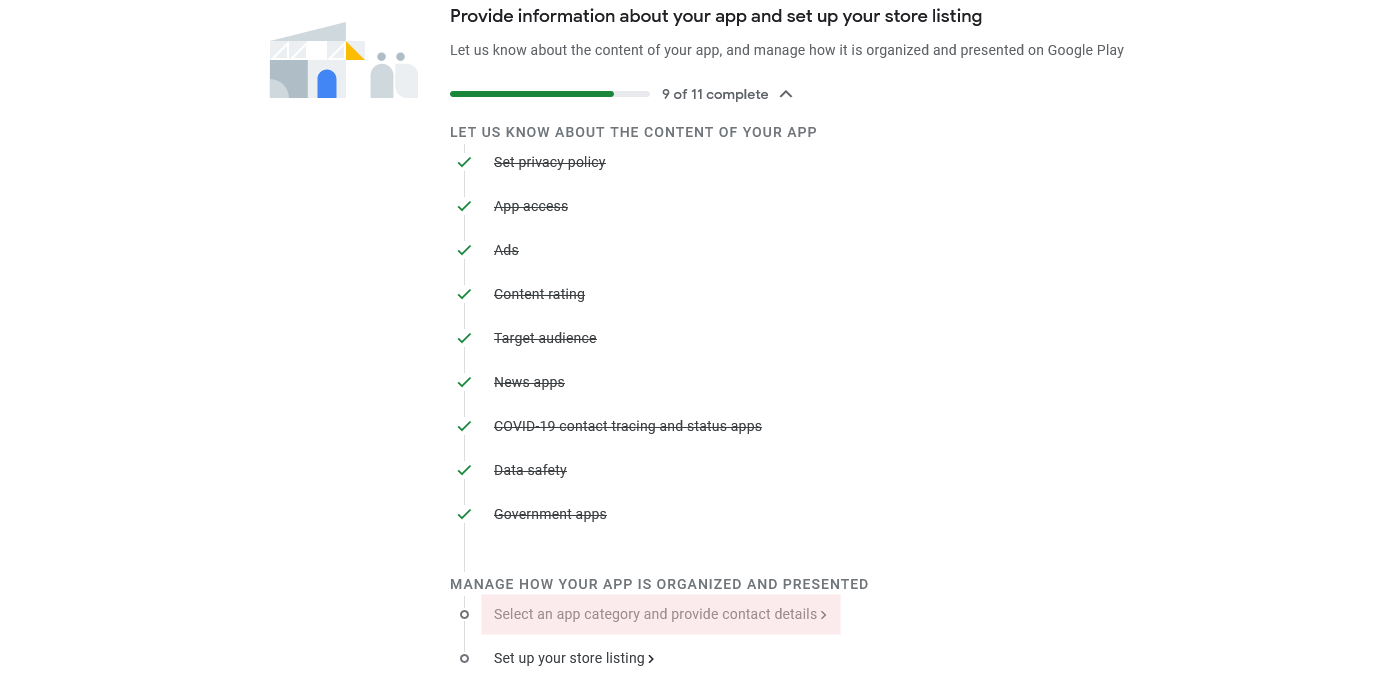
Here you need to select/input the following details:
- App or game: for most apps created with WebNativefier the correct selection is "App".
- Category: here you need to choose a category for your app.
- Tags: here you can select up to 5 tags (sub-categories), that might be relevant for your app.
- Email address: this is the email address that will be displayed on google play where users can contact you if they need support with your app/website.
- Phone number: this field is optional.
- Website: this field is also optional, it is the official website for your business.
- External marketing: we recommend leaving this field checked, otherwise your app might not appear when someone searches for it in Google search.
After you input all fields, press the "Save" button to finish the task.
Finally, press the "Dashboard" button (9) to go back to the dashboard.
Once you're in the dashboard, start the last task (“Set up your store listing”).
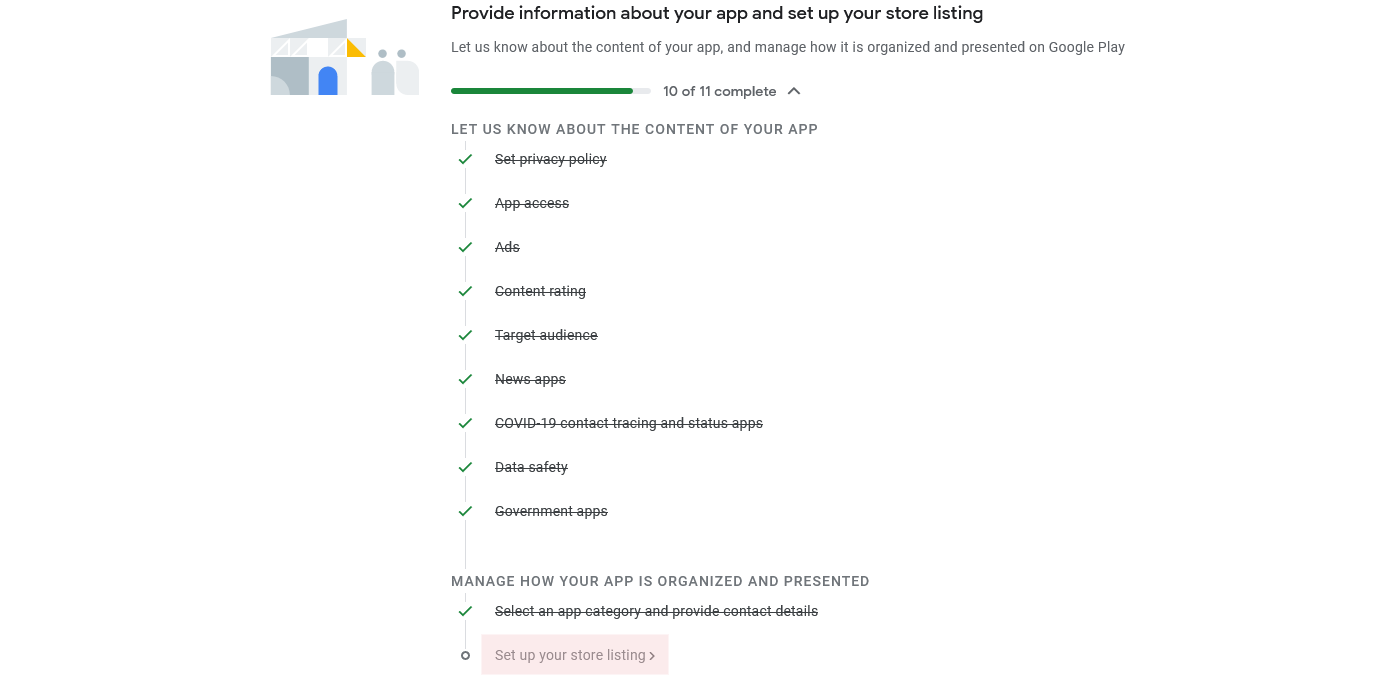
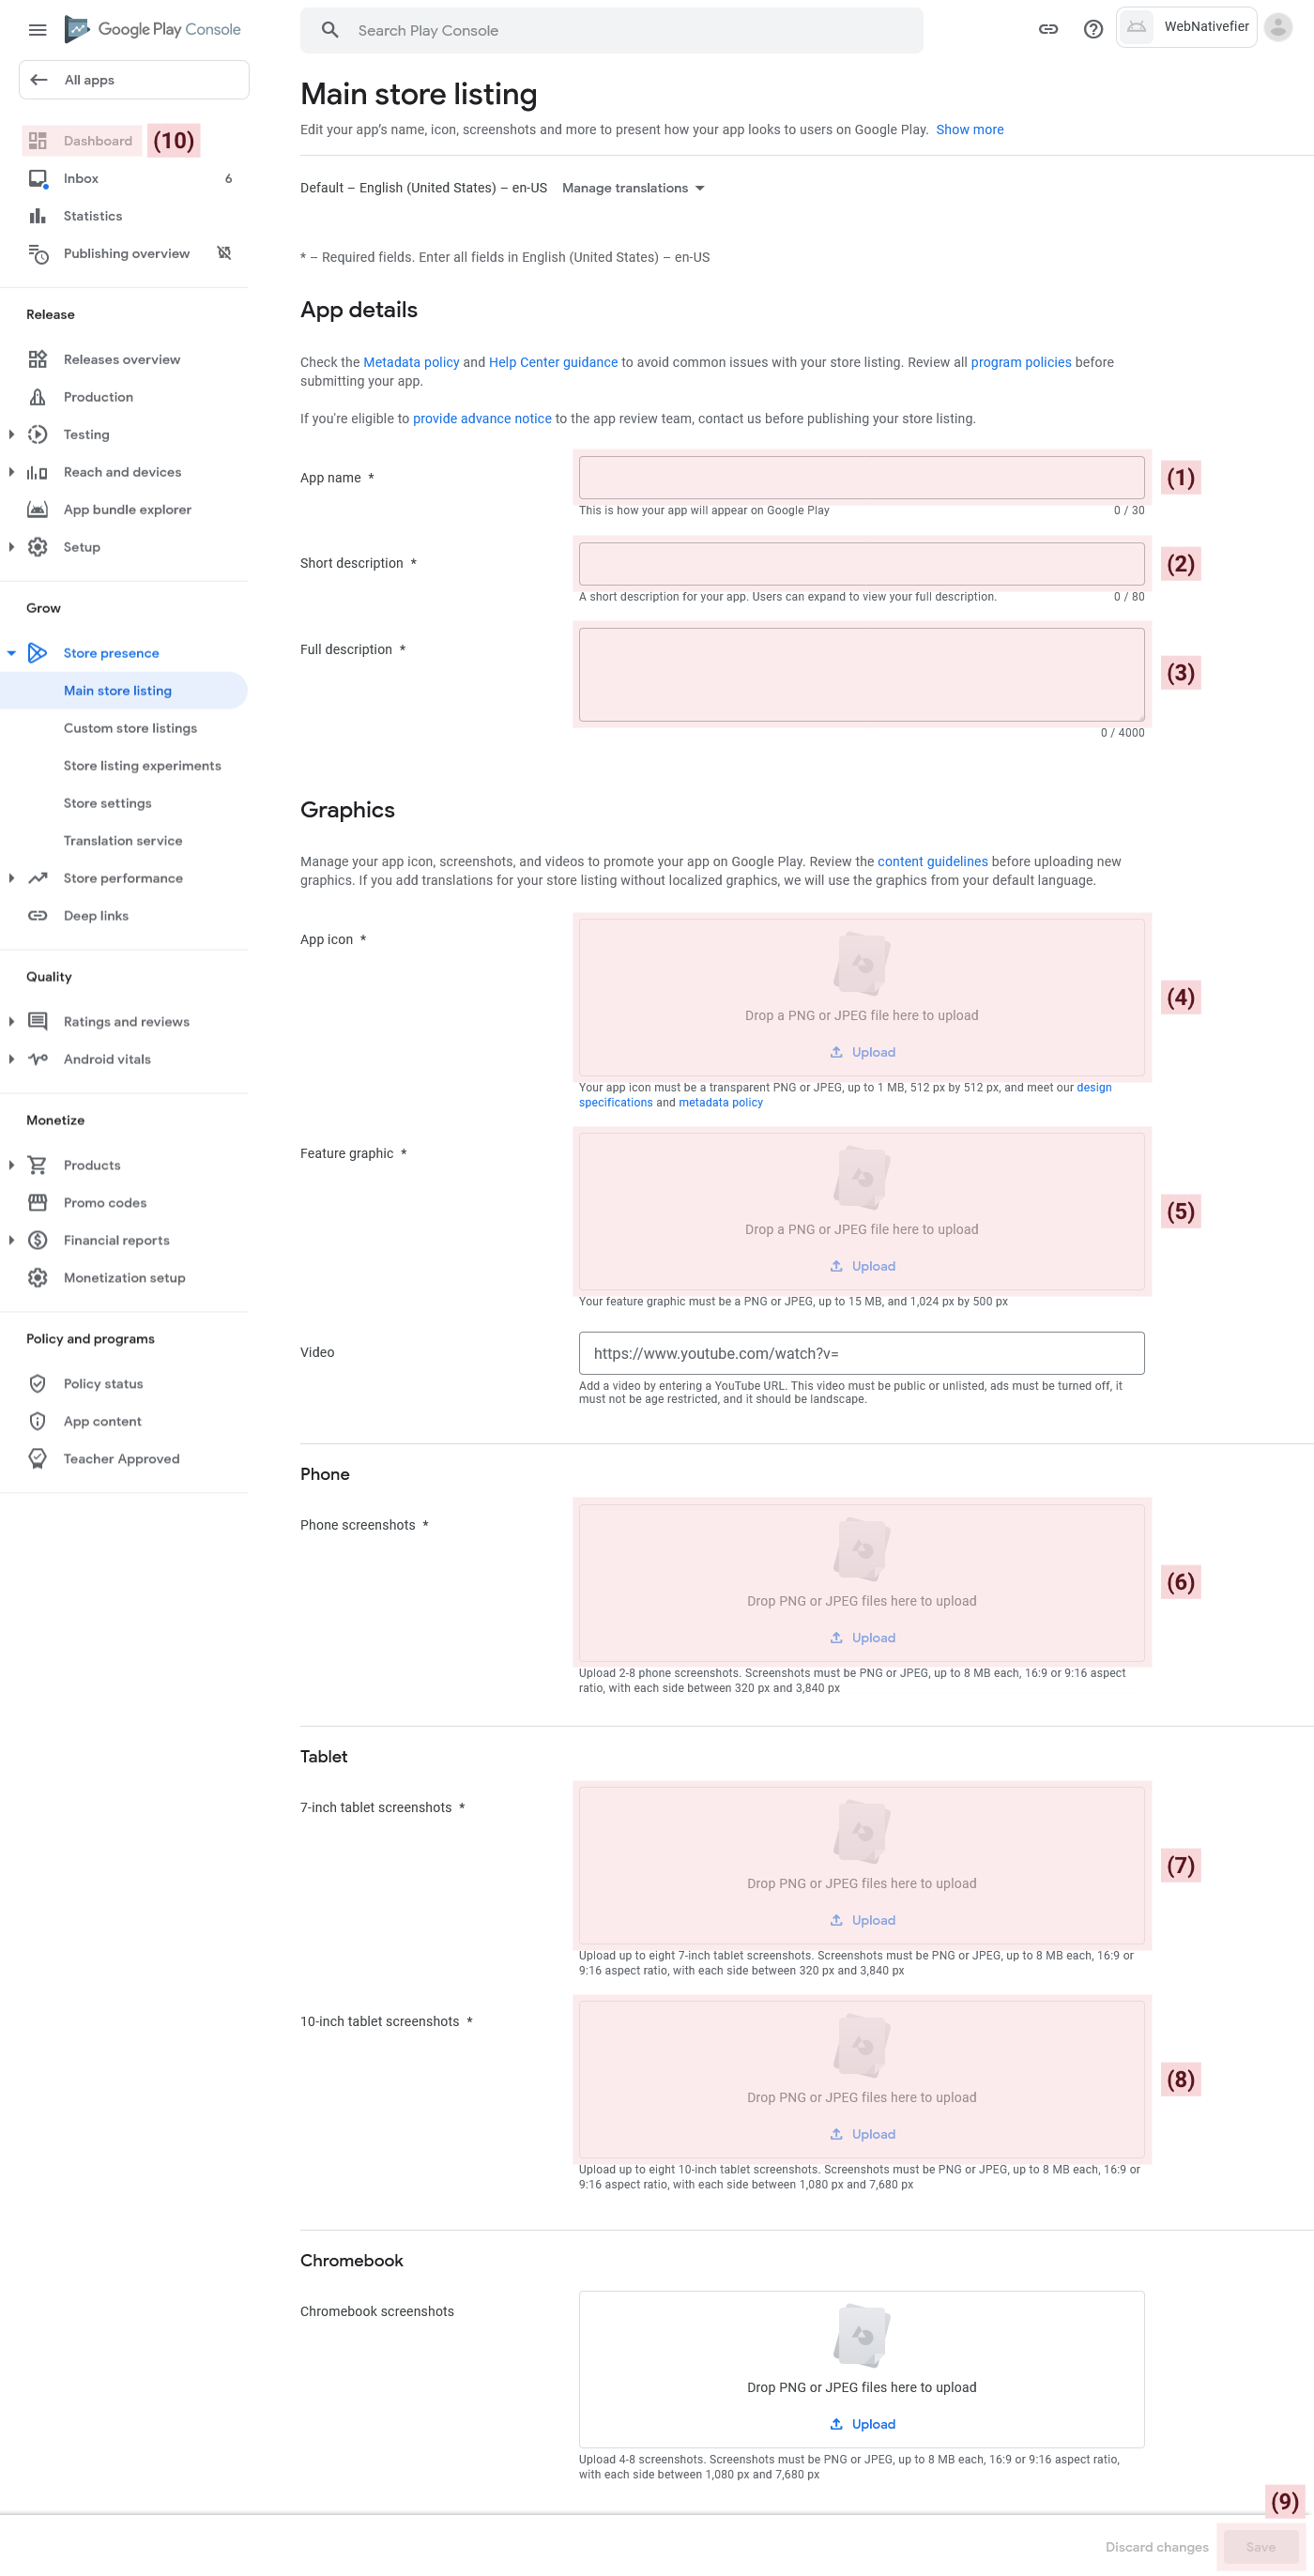
In this task you will set up all details for your store listing, like title, description, screenshots, etc.
Inside the ZIP file we sent you containing your application, you will discover all the necessary resources for this task. While our offerings for this task are meant to serve as a foundation, you have complete freedom to modify them according to your preference.
Open the "store-listing" folder inside the ZIP file that we sent you and follow the steps below:
- App name: paste here the content from the "title.txt" file.
- Short description: paste here the content from the "short-description.txt" file.
- Long description: paste here the content from the "long-description.txt" file.
- App icon: upload here the "app-icon.png" file.
- Feature graphic: upload here the "feature-graphic.png" file.
- Phone screenshots: upload here the four "phone-screenshot" .png files.
- 7-inch tablet screenshots: upload here the two "small-tablet-screenshot" .png files.
- 10-inch tablet screenshots: upload here the two "large-tablet-screenshot" .png files.
After you write all content and upload all required files, press the "Save" button to finish the task.
Finally, press the "Dashboard" button to go back to the dashboard.
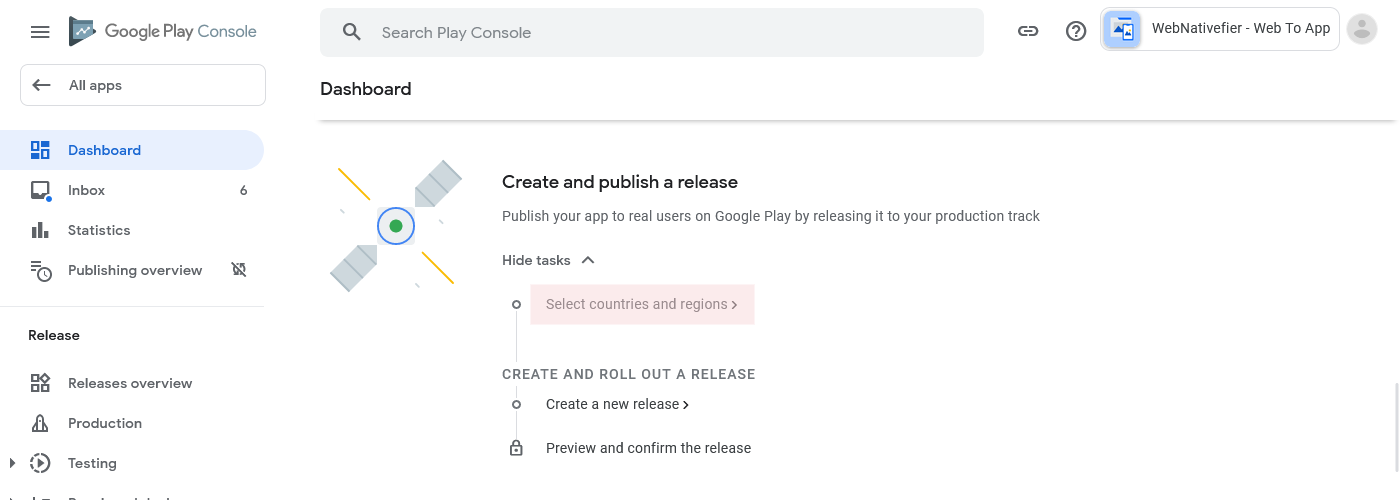
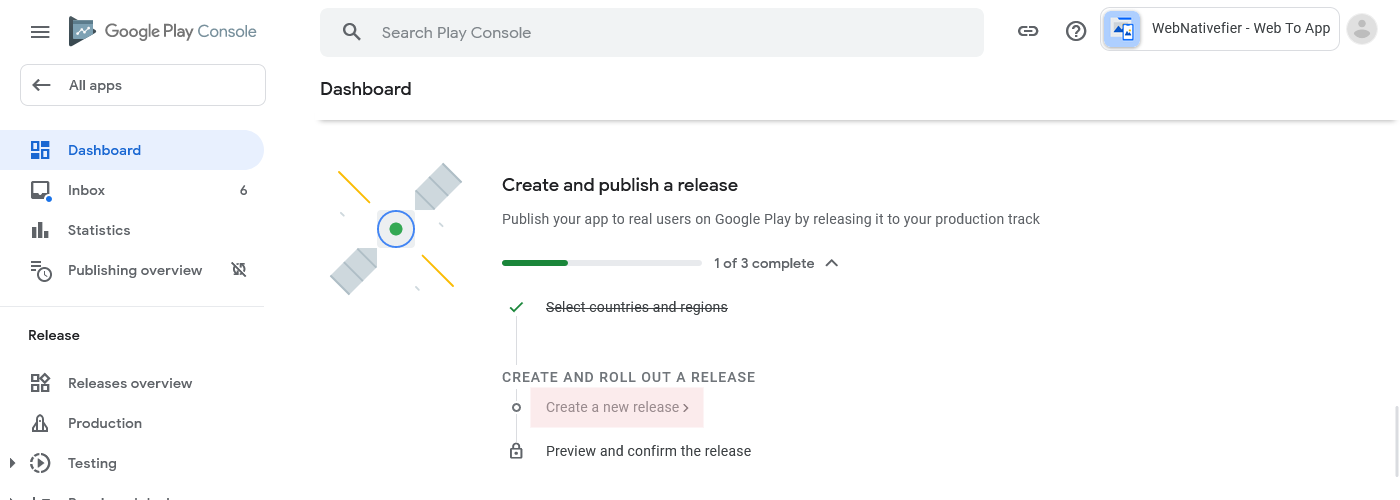
Once you're finished with the task and have arrived in the Dashboard, scroll down to the "Create and publish a release" section.
Press the "View tasks" button, and start the "Select countries and regions" task from the list.
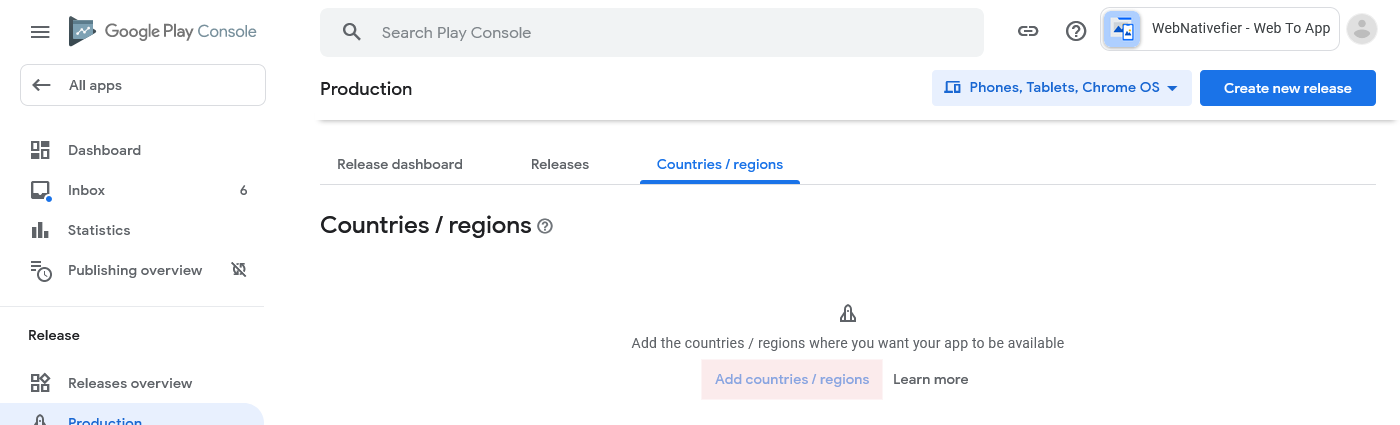
On the next screen, press the "Add countries / regions" button.
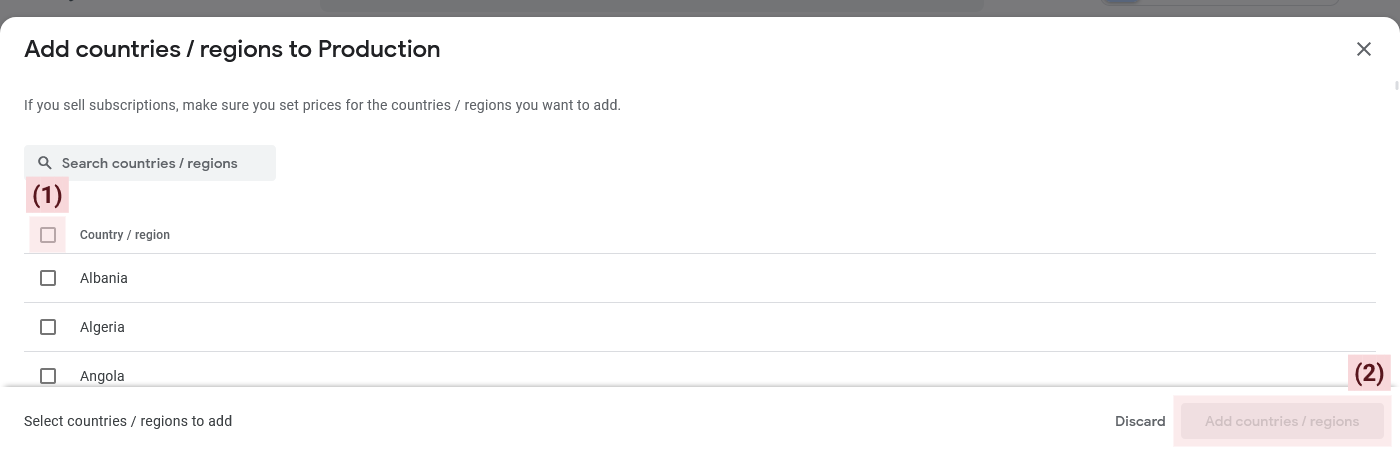
A pop-up window will appear, allowing you to choose the countries in which you would like your app to be downloadable.
By checking the top checkbox, you can select all countries at once.
Once you're done with the selection, press the "Add countries / regions" button to save the selection.
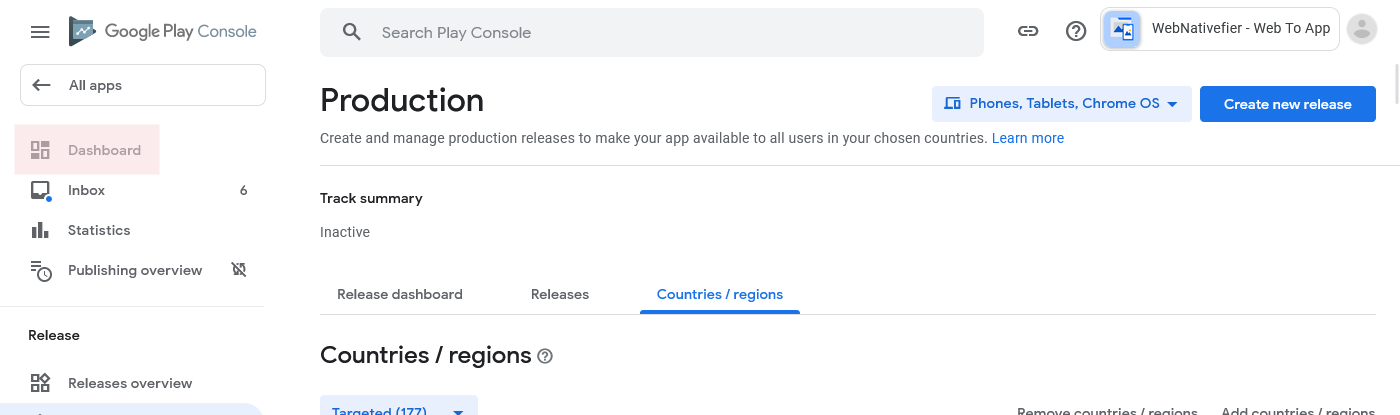
After the popup closes automatically, press the "Dashboard" button to go back to the dashboard and start the next task.
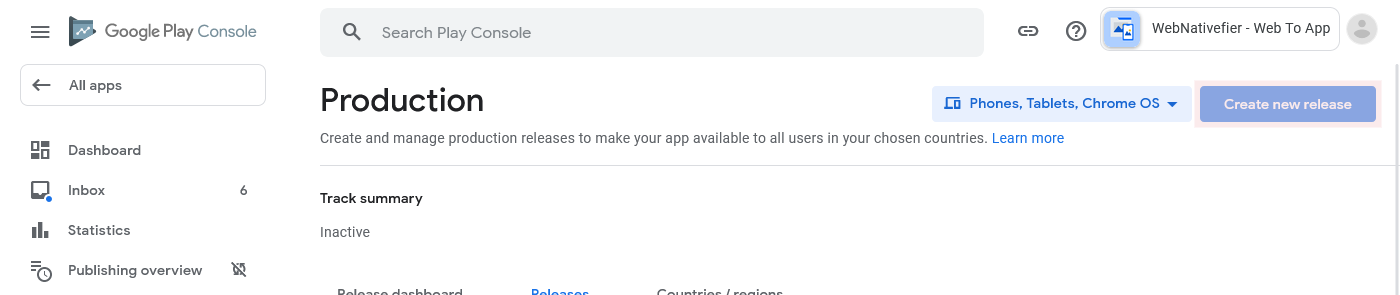
Once you’re in the Dashboard, start the “Create a new release” task.
On the next screen, press the "Create new release" button at the top-right.
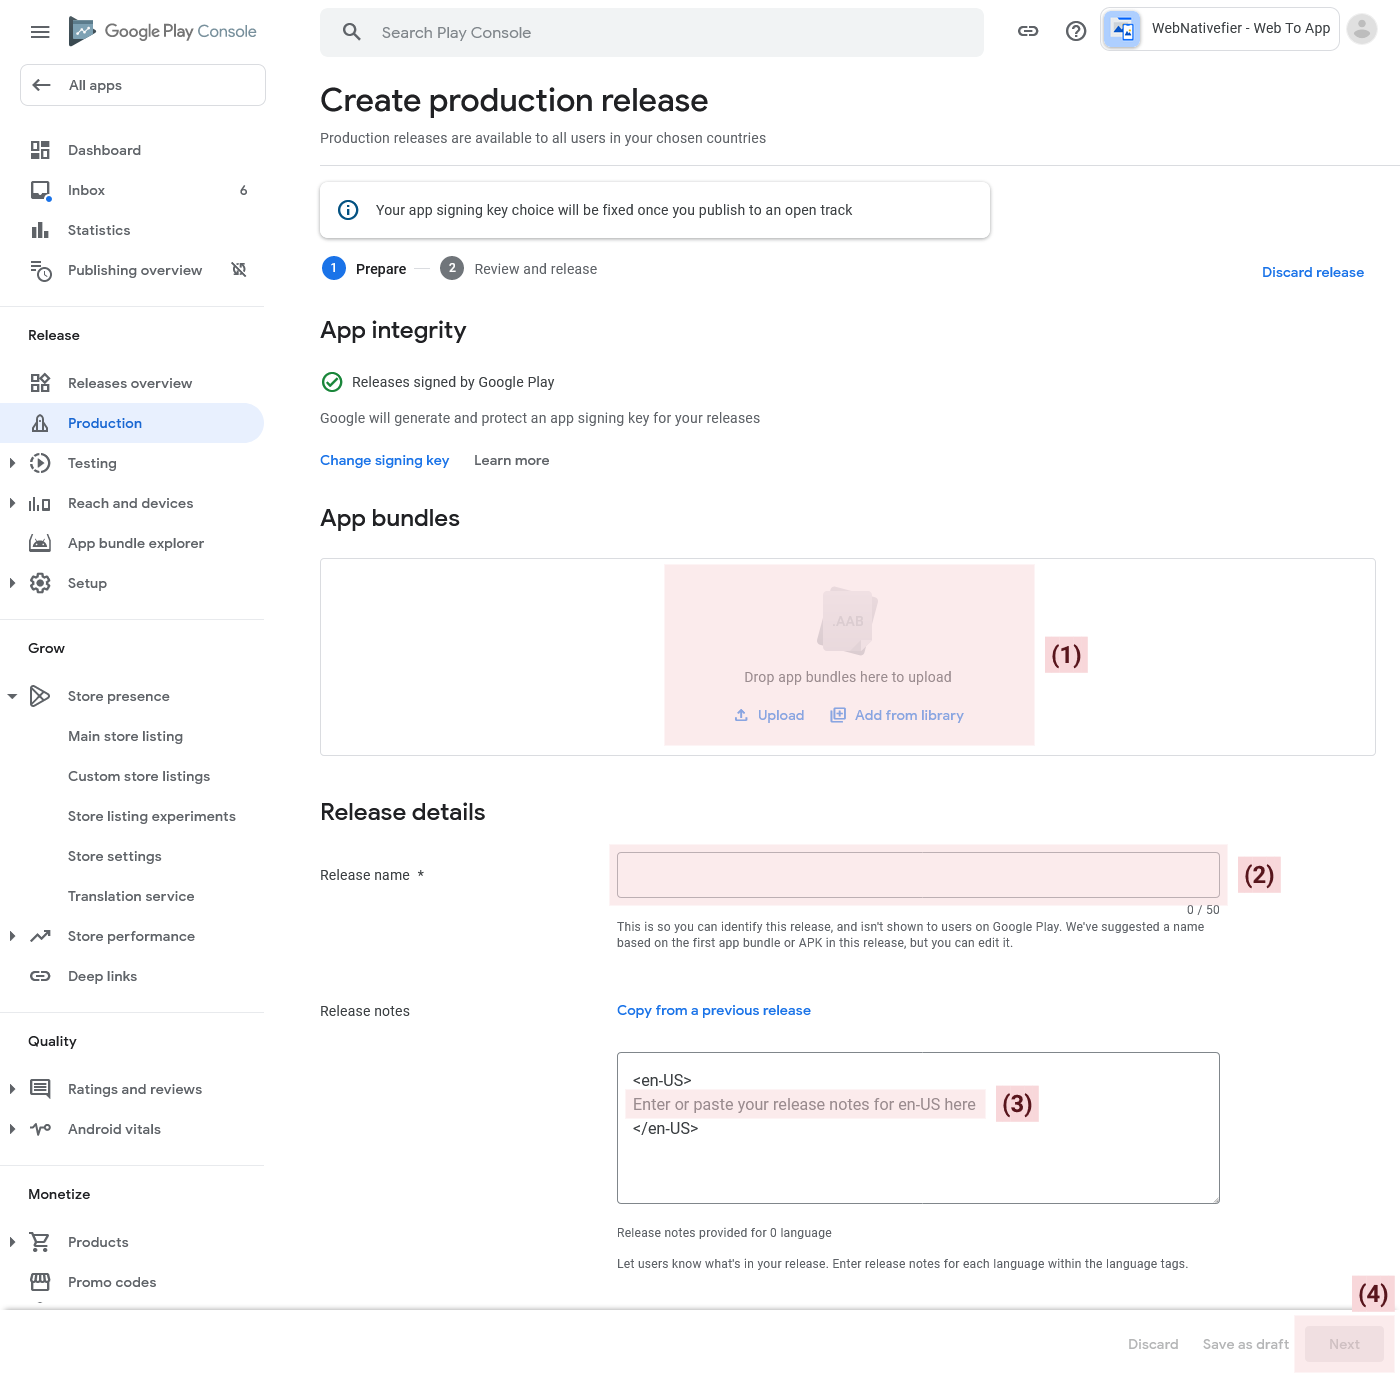
Now a new screen will show up where you'll need to upload your app file and write release notes.
- App bundles: upload here the "app-release.aab" file from the ZIP that we sent you.
- Release name: this field should be filled automatically when you upload the file above.
- Release notes: paste here the content from the "release-notes.txt" file that you can find in the ZIP that we sent you. Make sure to not remove the "en-US" tags, just paste the text between them, as show on the image below.
When you're done, press the “Next” button to continue to the next screen.
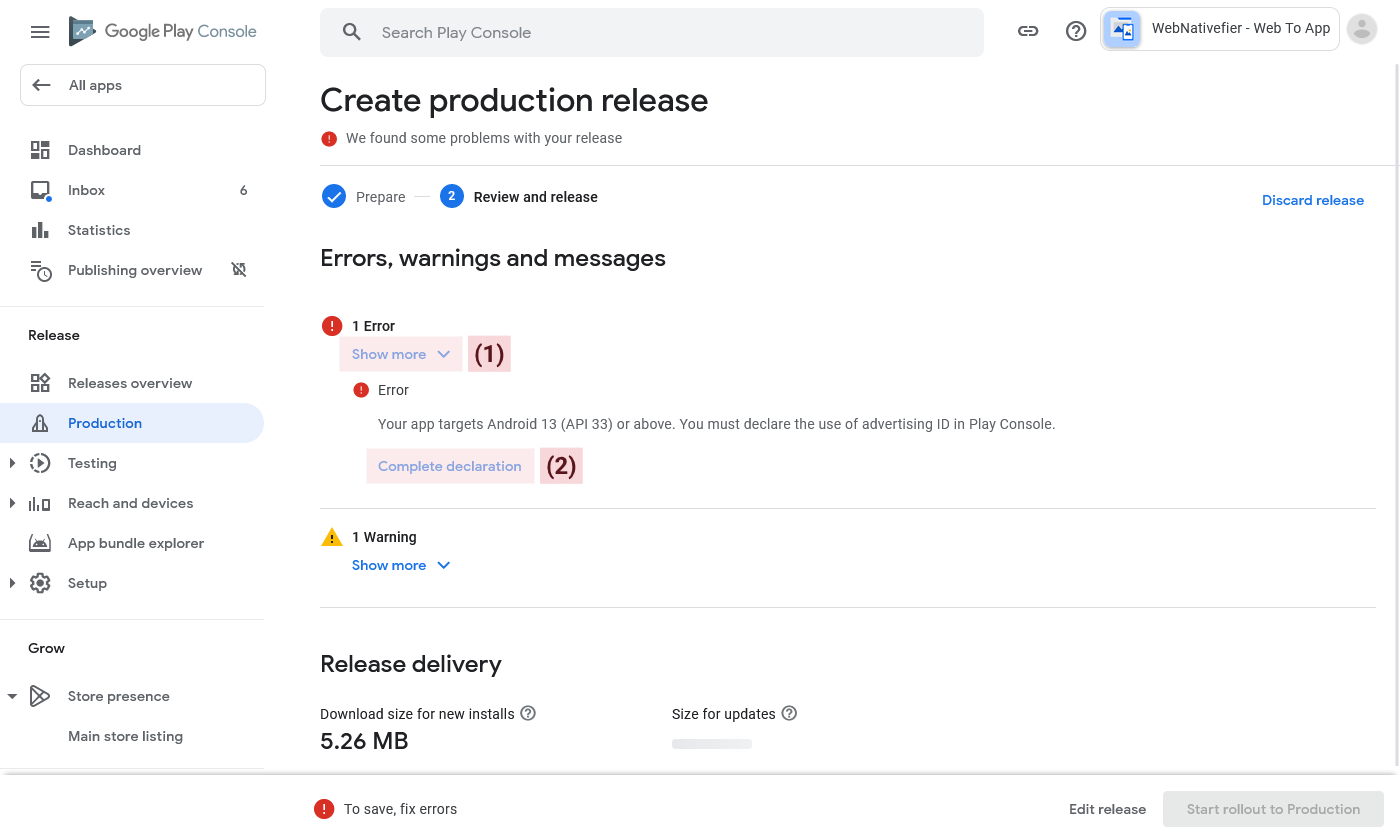
After you press "Next", a new screen will show up where you'll notice that there is "1 Error" with the release. (there is also 1 warning, which can be ignored)
Let's fix the error.
First, press the "Show more" button to see the error message.
Then, press the "Complete declaration" button.
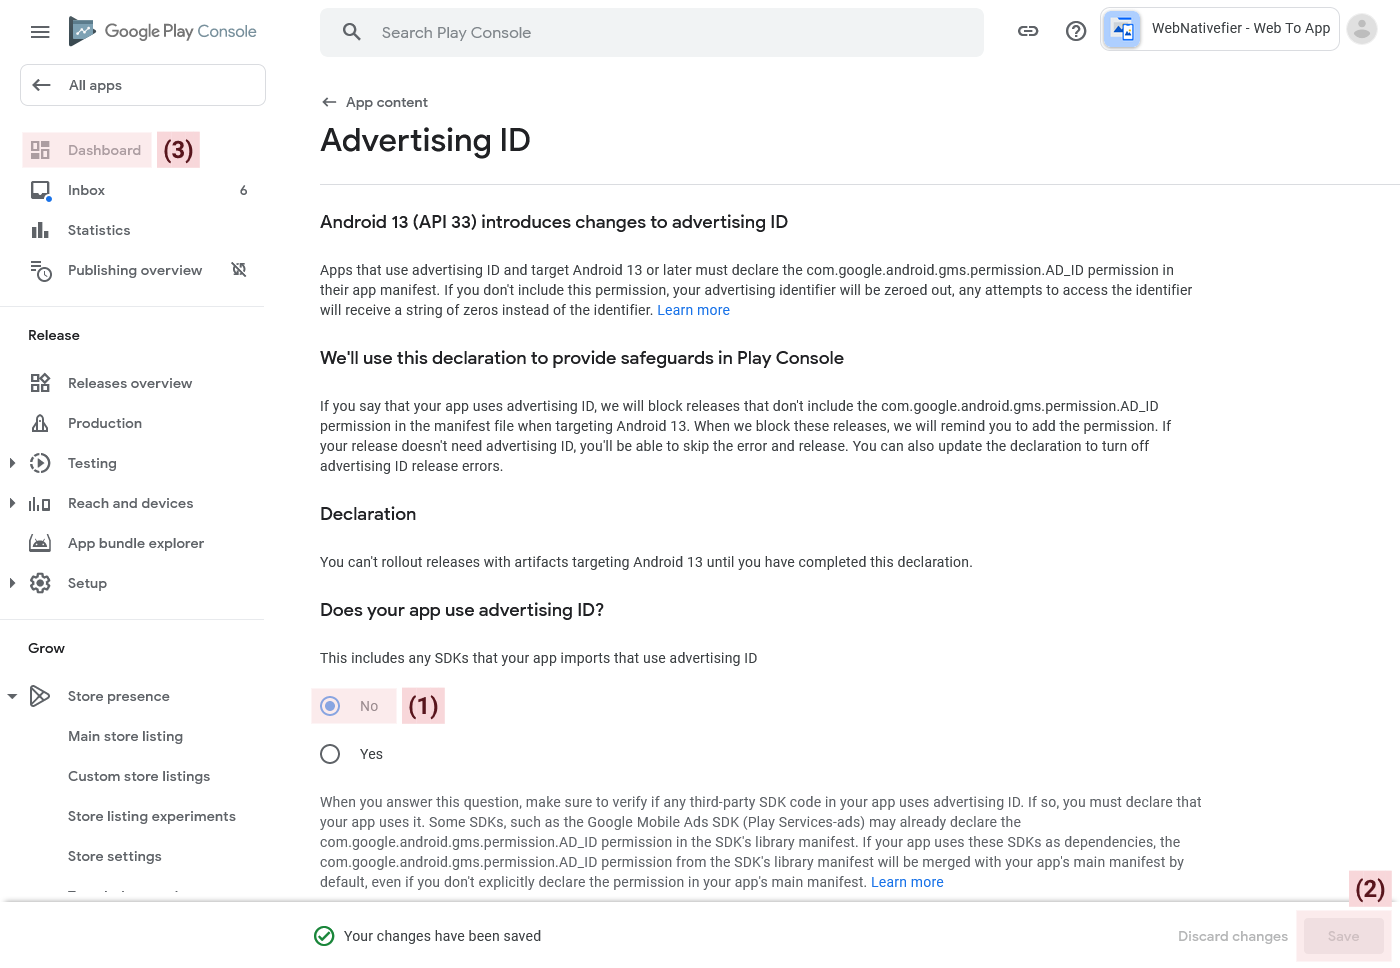
After you press "Complete declaration", a new screen will show up where you'll need to declare whether your app uses the advertising ID.
Since apps created with WebNativefier do not use advertising ID, you should select "No".
- Select the "No" option, for the question "Does your app use advertising ID".
- Press the "Save" button to finish the declaration.
- Press the "Dashboard" button to go back to the dashboard.
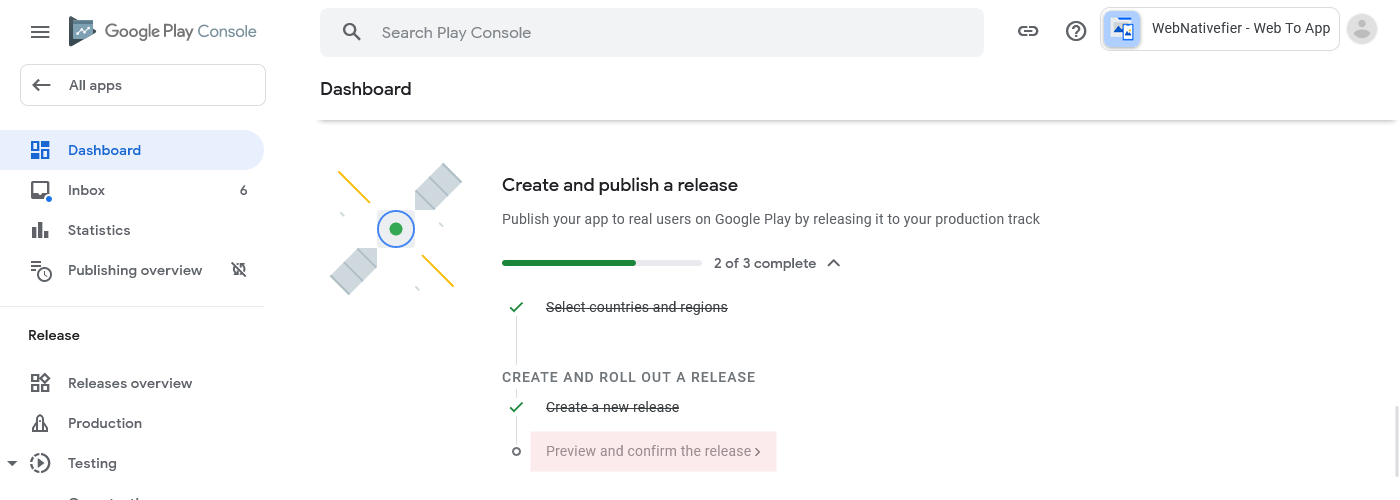
Once you’re in the Dashboard, start the final task of this tutorial: “Preview and confirm the release”.
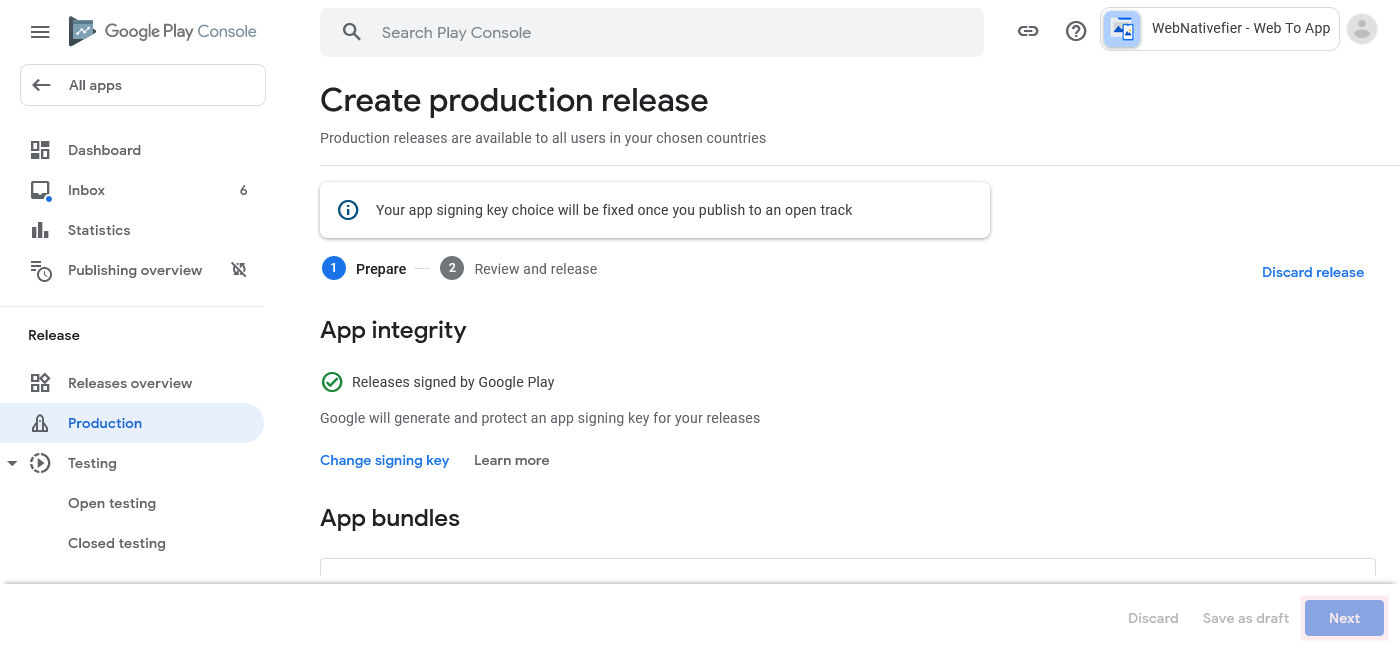
On the next screen, press the "Edit release" button in the top-right corner.

On the next screen, press the "Next" button.
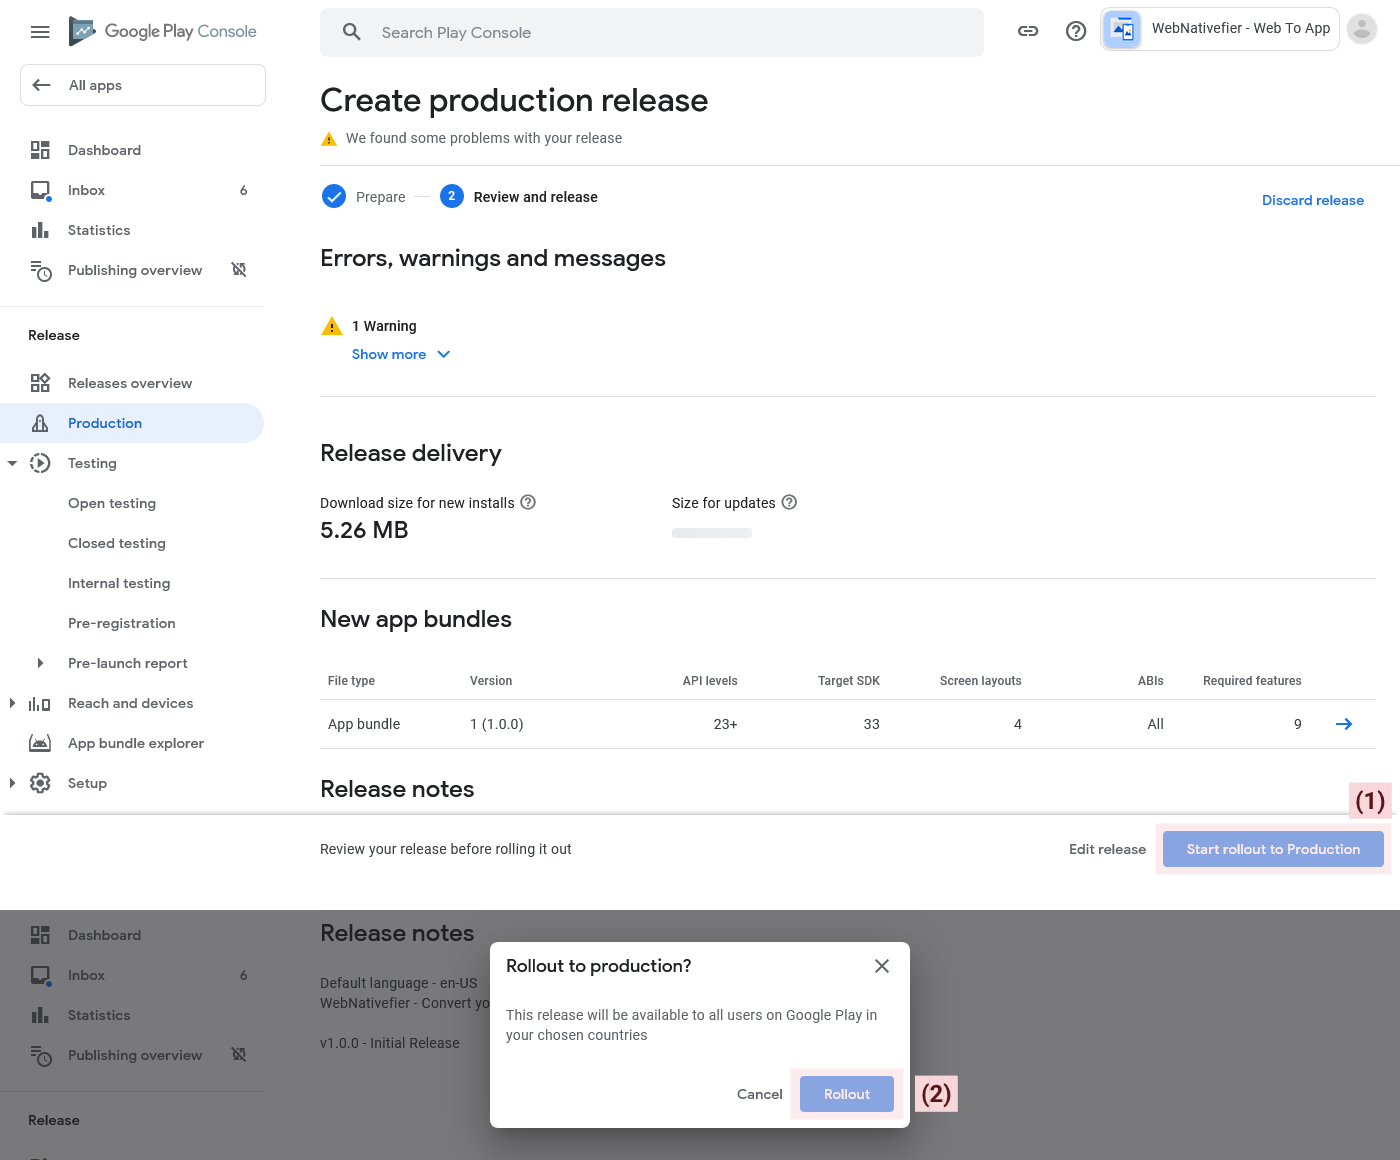
On the next screen, you'll see the release summary and you'll notice that the error you had previously is gone.
Now, the final thing to do is:
- Press the "Start rollout to Production" button.
- Confirm by pressing the "Rollout" button in the popup.
Finally, press the "All apps" button in the top-left of the screen, to go back to the start page of your Google Play Console.

That's all. Your app is now "In review" and a Google representative will review it over the next few days. If there are no problems, your app will be approved it's status will change from "Draft" to "Production". After this point your app will be available for download on the Google Play Store.
If you have any questions, do not hesitate to contact us at support@webnativefier.com, we usually reply within 24 hours.